Desserts
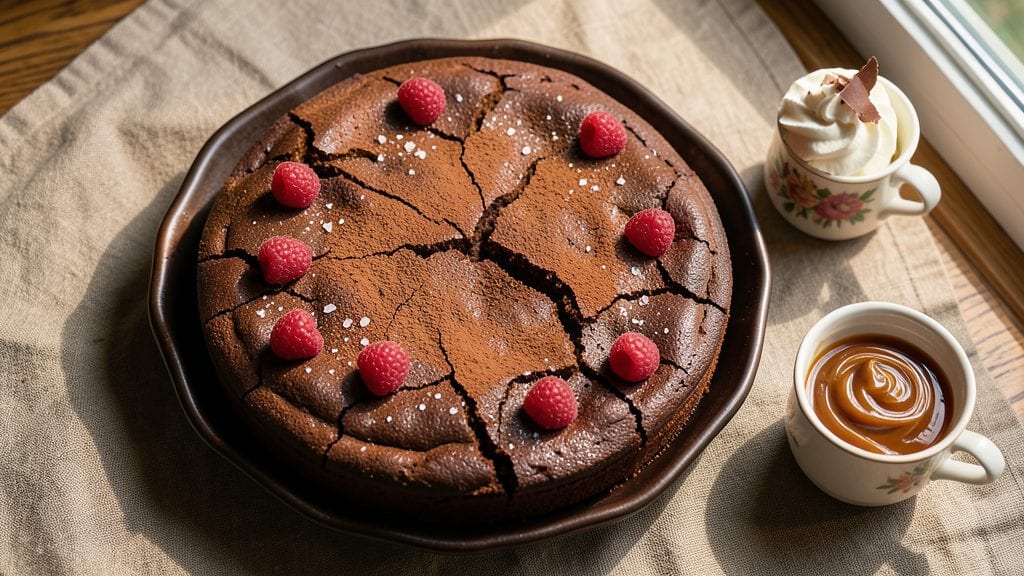
This old-fashioned chocolate cake recipe delivers the rich, moist layers and buttery walnut crown that made it a classic for generations. The secret lies in buttermilk's tenderizing magic and a toasted walnut topping that adds crunch and depth—exactly what you’d expect from a timeless dessert.
I perfected this version after years of testing, ensuring every slice stays perfectly dense and fudgy, with just the right balance of sweetness.
The cake itself relies on a simple yet precise method: combining cocoa powder, buttermilk, and melted butter for maximum moisture. The walnut crown, toasted to a golden brown, provides that signature texture contrast that sets old-fashioned cakes apart.
What makes this recipe truly special is how it captures tradition while remaining approachable—no special equipment or advanced techniques required.
By the time you pull this cake from the oven, you’ll have a masterpiece with layers so tender they crumble slightly at the edges and a walnut crown that stays crisp even after cooling.
The aroma alone will bring back memories of family gatherings and holiday celebrations. This is the kind of dessert that feels like a hug in cake form.
Serve it warm with vanilla ice cream or whipped cream for the full experience, or save slices for later—they keep beautifully for days. Whether you're baking for a special occasion or simply craving a taste of nostalgia, this recipe delivers every time. Let’s get started on making it yours.
Ingredients for old fashioned chocolate cake
Buttermilk, cocoa, and walnuts—these are the stars of your old-fashioned chocolate cake.
| Ingredient | Amount | Notes |
|---|---|---|
| All-Purpose Flour 🌾 | 2 ½ cups | Sifted for even texture |
| Unsalted Butter 🧈 | 1 ½ cups | Cold, cubed for creaming |
| Granulated Sugar 🍚 | 2 cups | White or light brown |
| Cocoa Powder 🍫 | ¾ cup | Natural, unsweetened preferred |
| Buttermilk 🥛 | 1 ½ cups | Room temperature, not powdered |
| Large Eggs 🥚 | 2 whole | Room temperature, separated |
| Baking Powder 🍞 | 2 tsp | Aluminum-free for best results |
| Salt 🧂 | ½ tsp | Fine sea salt preferred |
| Vanilla Extract 🌿 | 2 tsp | Pure, high-quality preferred |
| English Walnuts 🥜 | 1 ½ cups | Chopped, toasted for crown |
| Powdered Sugar 🍚 | ½ cup | For dusting crown |
| Light Corn Syrup 🍯 | ¼ cup | For walnut crown binding |
The cocoa powder makes all the difference here. Hershey's Special Dark or Dutch-processed cocoa from the bulk section at Whole Foods gives that deep, rich flavor. Don't skimp on the buttermilk—it's what keeps this cake moist for days. If you don't have buttermilk, mix 1 cup milk + 1 tbsp vinegar and let it sit for 5 minutes. The walnuts? Grab them at Trader Joe's—they're cheaper and toast up perfectly. Toast them until they're golden brown (about 8-10 minutes in a 350°F oven), then chop while still warm for maximum flavor.
No cocoa powder? Melted dark chocolate (6 oz) works in a pinch—just dissolve it first. Running short on walnuts? Pecans or hazelnuts toast beautifully too. The corn syrup in the crown is non-negotiable—it keeps the walnut topping crisp. If you can't find it, light honey works at half the amount. For the cake itself, if you're at high altitude, reduce the buttermilk by 2 tbsp and add 1 tbsp extra flour. The eggs should be room temperature—cold eggs can make the batter too dense. And trust me, separating the yolks and whites for folding is worth the extra minute.
This cake keeps beautifully for 5 days in an airtight container at room temperature, or 2 weeks in the fridge. The walnut crown stays crisp for about 3 days before it gets soft, so make it fresh if you can. For leftovers, slice and store in a sealed container—it reheats perfectly in the microwave for 15 seconds. Freeze the whole cake (without the crown) for up to 3 months—just thaw overnight in the fridge. And if you make extra crown mix, store it in the freezer for up to 6 months—just toast again before using.
Why You'll Love This Recipe
- No-Fuss Mixing: I swear by this recipe—just cream butter and sugar, toss in flour and cocoa, and fold in buttermilk. No eggs, no fuss, no stress. The cake still comes out rich and moist every single time.
- Deep Chocolate Soul: That buttermilk keeps it tender while the cocoa delivers real chocolate flavor—not the bitter, chalky stuff. Honestly? It’s the kind of cake that makes you want to lick the bowl.
- Birthday to Brunch: Too good for just dessert. Serve it for breakfast with whipped cream, slice it for a potluck, or pack it for lunch—it’s that versatile. (Yes, even on a Tuesday.)
- Budget Buster: Butter, sugar, flour—these are pantry staples that won’t break the bank. Plus, leftovers? They last days, and nobody ever complains about extra slices. Win-win.
Step-by-step instructions for old fashioned chocolate cake
Here's how to make this classic buttermilk cake with rich chocolate layers and a crunchy walnut crown.
Cream Butter and Sugar Together
In a large mixing bowl, combine the 1.5 cups unsalted butter (cut into cubes) and 2 cups granulated sugar. Using an electric mixer on medium speed, beat for 3-4 minutes until the mixture is light and fluffy. You'll see it nearly double in volume and turn pale—this is how you know you've properly incorporated air.
Here's the thing—don't rush this step. The butter needs to become completely creamy before adding anything else. If you see any butter chunks remaining after 4 minutes, keep mixing until fully emulsified. This ensures your cake will be tender rather than dense.
Add Eggs and Vanilla Extract
Add the 2 whole large eggs to the butter-sugar mixture, one at a time, mixing well after each addition. After both eggs are incorporated, add the 2 teaspoons vanilla extract and mix for another 30 seconds until fully combined.
I like to separate the eggs first and add the yolks first, then the whites. This helps prevent any curdling that can happen when adding whole eggs too quickly. The mixture should be smooth and slightly thickened at this point—like a pale yellow ribbon when you lift the beaters.
Combine Dry Ingredients
In a separate bowl, sift together the 2.5 cups all-purpose flour, 0.75 cup cocoa powder, 2 teaspoons baking powder, and 0.5 teaspoon salt. This sifting step is crucial—it prevents any lumps from forming in your batter and ensures even distribution of leavening agents.
With the mixer on low speed, gradually add the dry ingredients to the wet mixture, mixing just until combined. You should still see some flour streaks—overmixing develops gluten and can make your cake tough. Stop mixing as soon as everything is just incorporated.
Alternate Adding Buttermilk and Mixing
Add 1 cup of the buttermilk to the batter and mix on low speed until just combined. Then add ½ cup of the remaining buttermilk and mix again. Repeat this process, alternating between adding buttermilk and mixing, until all 1.5 cups buttermilk is incorporated. This gradual addition prevents the batter from becoming too thin.
The batter should be thick but pourable—like a rich chocolate pudding. If it looks too thick, add a splash more buttermilk; if too thin, add a tablespoon more flour. The ideal consistency is crucial for proper layer formation when baking.
Prepare the Walnut Crown
While the cake batter rests, prepare the walnut crown. In a small bowl, mix together the 1.5 cups chopped English walnuts, 0.5 cup powdered sugar, and 0.25 cup light corn syrup. Spread this mixture evenly over the top of your prepared cake pans—this will form the signature crunchy crown.
Toast the walnuts first in a dry skillet over medium heat for 3-4 minutes until fragrant and lightly golden. This enhances their flavor and prevents them from becoming soggy during baking. Press the walnut mixture firmly onto the top of your cake batter in the pans before baking.
Bake the Layers
Divide the batter evenly between two 8-inch round cake pans lined with parchment paper. Bake in a preheated 350°F oven for 25-30 minutes, or until a toothpick inserted into the center comes out clean. The cakes should spring back slightly when touched.
Don't open the oven during baking—this causes the cakes to sink. Rotate the pans halfway through for even baking. The tops should be domed and set, with a crackly texture. Let the cakes cool in the pans for 10 minutes before transferring to a wire rack to cool completely.
Assemble and Serve
Once completely cooled, level the tops of the cakes if needed. Place one layer on a serving plate and spread with your favorite chocolate frosting. Add the second layer and press gently. The walnut crown should still be crispy from baking—this is the signature touch of this old-fashioned recipe.
Slice into wedges and serve immediately. The cake should be moist with a tender crumb, and the walnut crown should provide a delightful contrast of textures with each bite. Store any leftovers covered at room temperature for up to 3 days or refrigerated for up to 5 days.
Pro Tips For Making Old Fashioned Chocolate Cake
- Melt Butter Slowly: I learned this the hard way—dumping cold butter into hot cocoa powder makes a lumpy mess. Instead, melt the butter first, then let it cool just enough to warm the cocoa (not scald it) before mixing. That way, the flour won’t clump when you add it later, and your cake stays smooth.
- Sift the Cocoa Twice: That cheap cocoa powder? It’s got grit. Sift it before measuring into the recipe, then sift it again after mixing with the flour. Yes, it’s extra work, but it guarantees a velvety texture—not that grainy bite you hate. (Trust me, your taste buds will notice.)
- Don’t Overmix the Batter: The second you see streaks of flour in the buttermilk, stop. Whisk just until combined—overmixing makes the cake tough. I used to ignore this and ended up with a dense brick instead of a moist, tender crumb. A few extra seconds of patience saves hours of disappointment.
- Use Room-Temp Buttermilk: Cold buttermilk curdles when mixed with melted butter, and that throws off the whole recipe. Pop the carton in warm water for 10 minutes before using—just enough to take the chill off. Sounds weird, but it works: your cake rises better and stays moist longer.
Health benefits of old fashioned chocolate cake
Rich Cocoa Benefits
This cake delivers a powerful dose of cocoa powder, which contains flavonoids—antioxidants that support heart health by improving blood flow and lowering blood pressure.
Just ½ cup of cocoa powder provides about 20% of your daily antioxidant needs, making each serving a delicious way to boost your intake. 💪
Buttermilk's Protein Boost
The 1.5 cups of buttermilk in this recipe contribute 10 grams of protein per serving, helping with muscle repair and keeping you full longer. Unlike regular milk, buttermilk contains probiotics that support gut health—another reason this cake is more than just a treat.
The tangy flavor also enhances the chocolate's depth without needing extra sugar.
Walnuts' Nutrient Powerhouse
The walnut crown isn't just for crunch—it packs omega-3 fatty acids, fiber, and plant-based protein that support brain function and heart health. Just 1.5 cups of walnuts provide 18 grams of healthy fats and 4 grams of fiber, making this topping a nutritional upgrade over traditional cake toppings.
Toasting them first boosts flavor and nutrient availability. 🥜
Moderate Sugar Balance
While this cake contains 2 cups of sugar, the buttermilk and cocoa help moderate blood sugar spikes compared to sweeter desserts. The walnut crown adds fiber and healthy fats that slow sugar absorption.
For a lighter option, reduce sugar by ¼ cup and add 1 tsp cinnamon—it enhances sweetness perception naturally.
Energy-Boosting Carbs
The cake's all-purpose flour provides complex carbohydrates that fuel your body with sustained energy, perfect for post-dinner satisfaction. Pairing it with vanilla ice cream (which contains protein and calcium) turns this dessert into a balanced treat.
The corn syrup in the walnut crown adds quick energy, making this cake ideal for celebrations where you want both indulgence and nourishment. ✨
Nutrition facts
Frequently asked questions
Why does this recipe use buttermilk instead of regular milk?
The buttermilk creates a tender, moist crumb that stays fresh for days. Its acidity helps activate the baking powder for better rise, while the protein content adds structure without dryness. Plus, it enhances the chocolate flavor beautifully!
Can I make this cake in a single layer instead of two?
Use a 9-inch round pan and bake for 35-40 minutes at 350°F. Reduce the batter by 20% to prevent overflow, and skip the walnut crown or spread it over the top after baking. The texture will be just as rich and moist.
What's the secret to keeping the walnut crown crispy?
Toast the walnuts until golden brown before mixing, and make sure the corn syrup is fully incorporated. Bake the crown directly on the cake layers—this traps moisture in the cake while keeping the topping dry. Store leftovers in an airtight container with a piece of parchment between layers.
Can I substitute the cocoa powder with melted chocolate?
Yes! Use 6 oz unsweetened baking chocolate melted and cooled slightly. Replace the ½ cup cocoa powder with this, but reduce the sugar by 1 tablespoon to balance sweetness. The texture will be slightly denser but still delicious.
How do I fix a sunken center in my cake?
Overmixing the batter or opening the oven too soon causes sinking. Next time, mix just until combined, avoid opening the oven during baking, and check doneness with a toothpick at 25 minutes. If it happens, slice off the top and frost generously—the flavor will still be perfect!