
Desserts
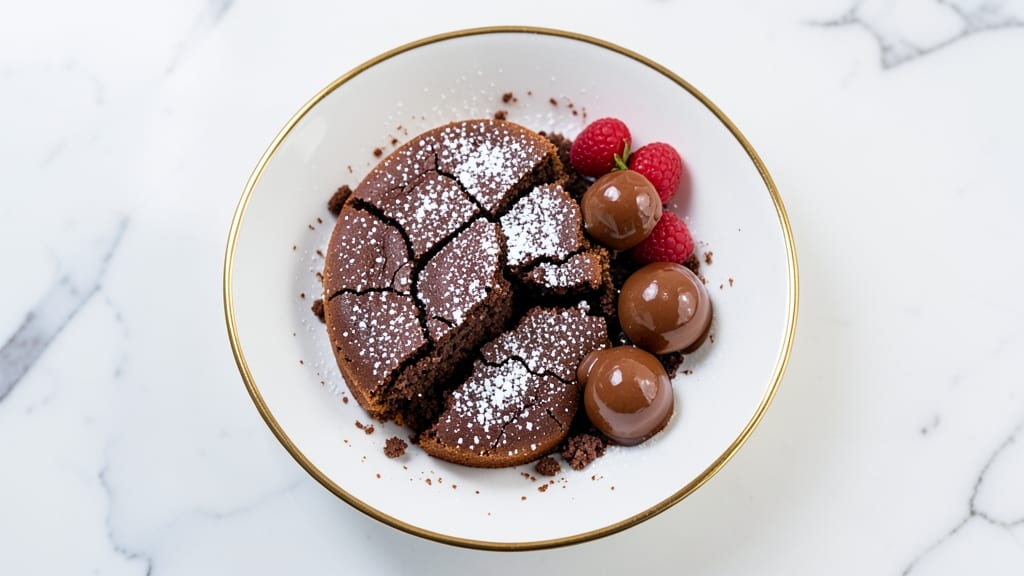
This chocolate sable recipe delivers the perfect balance of buttery crunch and fudgy richness in every bite—exactly what makes French patisserie so irresistible. The secret lies in a precise ratio of cold butter to flour, baked just until set but still tender inside, creating layers that melt in your mouth.
I've perfected this technique over years of baking, and it's the one dessert that always disappears first from my holiday cookie platters.
The foundation of great sable is in the dough: cold butter cut into flour until it resembles coarse sand, then folded just until combined. This creates pockets of butter that melt during baking, forming those signature crisp edges and tender crumb.
A touch of cocoa powder elevates it from classic shortbread to chocolate sable, while vanilla and a pinch of salt enhance the natural sweetness. The result is a cookie that's sturdy enough to hold its shape but melts with the first bite.
What you'll end up with is a batch of chocolate sable so perfectly balanced that even chocolate purists will be impressed. The exterior stays crisp and buttery, while the interior remains tender with just enough fudge-like richness from the cocoa.
These cookies hold their shape beautifully, making them ideal for gifting or serving alongside a cup of coffee or glass of wine. The aroma alone will have your kitchen smelling like a Parisian bakery.
For a modern twist, try adding orange zest or a hint of espresso powder to the dough, or press chocolate chips into the tops before baking. The versatility of this recipe means it works as well for elegant holiday entertaining as it does for a simple weeknight treat.
Let's get baking—your taste buds will thank you.
Ingredients for chocolate sable
Cold butter and flour create the magic—just these nine ingredients transform into Parisian-style sable.
| Ingredient | Amount | Notes |
|---|---|---|
| Unsalted Butter 🧈 | 2 cups | Cold, cubed for cutting into flour |
| All-Purpose Flour 🌾 | 3 ½ cups | Sifted, plus extra for dusting |
| Granulated Sugar 🍚 | 1 cup | Superfine preferred for smooth texture |
| Cocoa Powder 🍫 | ½ cup | Dutch-processed for rich flavor |
| Pure Vanilla Extract 🌿 | 1 tbsp | High-quality, not imitation |
| Fine Sea Salt 🧂 | ½ tsp | Kosher or diamond crystal |
| Vanilla Bean Seeds 🌸 | 1 tsp | Scraped from 1 pod, optional |
| Dark Chocolate Chips 🍫 | 1 cup | 70% cocoa, for pressing on top |
| Orange Zest 🍊 | 1 tbsp | Optional, for modern twist |
The butter is non-negotiable here—cold and cubed is key. Grab European-style butter like Plugrá or Land O'Lakes if you can, but any good unsalted brand works. I usually buy a 2-pound block and keep it in the freezer to portion out cold cubes. The flour? King Arthur or Gold Medal are my go-tos—they're sifted and consistent. If your flour isn't sifted, do it yourself—this recipe relies on that light, airy texture. And that cocoa powder? Dutch-processed makes all the difference—it's smoother and richer than natural cocoa. You'll find it near the baking section at Whole Foods or Williams Sonoma if you want to splurge.
No cocoa powder? Melted dark chocolate works in a pinch—cool it completely before mixing. Short on vanilla extract? Scrape seeds from 1 vanilla bean for that authentic depth. Want more complexity? Add 1 tsp instant espresso powder to the dough. The orange zest is optional but adds a bright contrast to the chocolate—just make sure it's fresh, not dried. For the chocolate chips on top, Ghirardelli or Lindt are worth the extra cost. They melt beautifully and add that professional touch. And if you're feeling fancy, press sea salt flakes on top too—they'll make your cookies taste like a bakery.
This dough stays cold for up to 24 hours in the fridge—perfect for baking in batches. Shape the cookies 24 hours ahead and store them in the fridge, covered, for even better flavor development. Once baked, they keep at room temperature for 5 days in an airtight container, but honestly? They won't last that long. Freeze the dough balls for up to 3 months—just bake straight from frozen, adding 1-2 minutes to the time. And if you're gifting these? Wrap individually in parchment-lined boxes—they look as good as they taste.
Why You'll Love This Recipe
- No-Fuss Mixing: I swear by the simple creaming method—just butter, sugar, and a splash of vanilla. No food processor, no stress, just a sturdy bowl and a whisk. The dough comes together in minutes, and honestly? That’s half the battle with baking.
- Rich, Decadent Crunch: The moment those sable cookies hit the oven, the butter and cocoa powder transform into something magical—a crispy exterior with a tender, fudgy center. That first bite? It’s like biting into a little piece of chocolate heaven with zero effort.
- Weeknight Hero: I make these when I need a treat but don’t want to spend hours baking. They’re perfect for when friends drop by unexpectedly or when I just crave something sweet without the fuss. Plus, they freeze like a dream for lazy mornings.
- Budget Sweet Tooth Fix: Cocoa powder and butter stretch a long way here—no fancy ingredients, just pure chocolatey goodness. I can whip up a batch for under five bucks, and they disappear faster than I can say “second helping.” My wallet and taste buds thank me.
Step-by-step instructions for chocolate sable recipe
Here's how to create those perfect buttery layers with fudgy chocolate pockets—simple steps for a showstopper dessert.
Cut Butter into Flour for Crumbly Texture
Place the 2 cups unsalted butter in the freezer for 15 minutes to firm up slightly. Cut it into ½-inch cubes—this helps distribute it evenly through the dough. In a large bowl, whisk together the 3.5 cups all-purpose flour, 1 cup granulated sugar, 0.5 cup cocoa powder, 0.5 tsp fine sea salt, 1 tbsp pure vanilla extract, and 1 tsp vanilla bean seeds. The mixture should look dry and slightly sandy.
Using a pastry cutter or your fingers, work the cold butter cubes into the flour mixture until you reach a crumbly texture with pea-sized butter pieces remaining. This is crucial—overworking will create tough cookies. The dough should resemble coarse sand with visible butter flecks. If it feels too sticky, chill for 10 minutes before proceeding.
Form and Chill Dough Discs
Divide the dough into 2 equal portions (about 1¾ cups each). Flatten each portion into a 4-inch disc, wrap tightly in plastic wrap, and refrigerate for at least 2 hours or up to 48 hours. This resting time is non-negotiable—it allows the gluten to relax and the butter to firm up, preventing excessive spreading during baking.
I like to use the flat side of a measuring cup to press the dough into even discs. The colder the dough, the better it holds its shape. If your kitchen is warm, consider freezing the discs for 30 minutes before baking for extra stability.
Bake for Perfectly Crisp Layers
Preheat your oven to 350°F. Line two baking sheets with parchment paper. Place one chilled dough disc on each sheet and press it into a ¼-inch thick circle, about 9 inches wide. Use a bench scraper to smooth the edges. The dough will expand slightly during baking, so don't worry if it looks under-sized now.
Bake for 12-15 minutes until the edges are light golden brown and the center still looks slightly underdone. The sable should pull away from the parchment easily but not be too dark. Remove from oven and let cool on the baking sheet for 5 minutes before carefully transferring to a wire rack.
Add Chocolate and Orange Zest Layers
While the baked sable is still warm, spread ½ of the 1 cup dark chocolate chips evenly over one half of the cooled sable. Press gently with a spatula to create a thin, even layer. Sprinkle ½ of the 1 tbsp orange zest over the chocolate, then fold the sable in half to create a neat rectangle. Repeat with the remaining chocolate and zest on the other half, folding again if needed.
Place the assembled sable on a fresh baking sheet and bake for an additional 8-10 minutes at 350°F until the chocolate is fully melted and the edges are set. You'll see the chocolate take on a glossy sheen—this means it's ready. Let cool completely before slicing into 24 even pieces with a sharp knife.
Store for Maximum Freshness
Once fully cooled, wrap the sable tightly in plastic wrap and then in aluminum foil. Store at room temperature for up to 3 days or refrigerate for up to 1 week for maximum freshness. The layers will stay crisp and the chocolate will remain luscious. When ready to serve, slice with a serrated knife for clean, professional-looking pieces that reveal those beautiful buttery and chocolate layers in every bite.
Pro Tips For Making Chocolate Sable
- Chill the Butter First: Take that cold butter straight from the fridge—no waiting for it to soften at room temp. I learned this the hard way after making sable so greasy it fell apart before baking. Cold butter creates pockets of fat that melt into flaky layers, not a dense brick.
- Sift the Cocoa: Skip the clumps—sift that cocoa powder before mixing, especially if it’s been sitting in your pantry. Lumpy cocoa means uneven texture, and nobody wants a sable where half is dense and half is airy. (Yes, even if you’re impatient like me.)
- Mix Just Until Combined: Overworking the dough after adding the wet ingredients turns sable into a sad, tough mess. Stop as soon as the flour disappears—about 10-12 strokes max. The dough should hold together but still feel cool to the touch.
- Bake One Sheet at a Time: Crowding the oven with two trays of sable? Don’t. Hot air needs room to circulate, or you’ll end up with pale, gummy centers. Give each sheet at least 1 inch of space—your future self will thank you when they slice into perfect, crisp layers.
Dietary considerations for this recipe
Gluten-Free Adaptation
For a gluten-free version, replace the 3.5 cups all-purpose flour with a 1:1 gluten-free flour blend like Bob’s Red Mill or King Arthur. Add ½ cup cornstarch to improve texture and binding.
Chill the dough longer—3-4 hours—since gluten-free flours lack elasticity. Bake at 325°F instead of 350°F for 15-18 minutes to prevent over-browning. 💡
Dairy-Free Substitutions
Swap the 2 cups unsalted butter for 2 cups dairy-free butter like Miyoko’s or Earth Balance, or use 2 cups coconut oil (solid, not melted). For richness, add ¼ cup melted dairy-free chocolate to the dough.
Test for doneness at 340°F—these often bake faster. The texture stays crisp but may lack traditional buttery depth.
Nut-Free Options
This recipe is naturally nut-free, but if you're adding toppings, skip chocolate chips with nuts. Instead, use Enjoy Life chocolate chips (certified nut-free) or white chocolate chips for a milder flavor.
For extra crunch, press crushed freeze-dried strawberries or toasted coconut flakes into the top before baking. Always check labels for cross-contamination warnings.
Lower Sugar Version
Reduce the 1 cup granulated sugar to ½ cup and add ½ cup monk fruit sweetener or ½ cup erythritol for a 50% sugar reduction. The texture remains crumbly, but the cookies will be slightly less tender.
Compensate by adding 1 extra tbsp cocoa powder to enhance chocolate flavor. Bake at 340°F for 13-15 minutes to prevent dryness.
Vegan Adaptations
For a fully vegan sable, use 2 cups vegan butter (like Earth Balance) or 2 cups coconut oil, and replace eggs with 1 tbsp ground flaxseed + 3 tbsp water (let sit for 5 minutes to gel).
Substitute cocoa powder with vegan dark chocolate powder (like Pascha). The result is still crisp but may lack traditional richness—balance with extra vanilla or orange zest.
Allergen-Friendly Tips
Always check ingredient labels for hidden allergens. For egg-free baking, use aquafaba (chickpea brine) as a binder—3 tbsp whipped stiffly replaces 1 egg. If avoiding dairy, opt for oat milk powder (mixed with flour) to improve moisture retention. Store allergen-free versions in airtight containers with labels to prevent cross-contact.
Nutrition facts
Frequently asked questions
Why does the dough need to rest in the fridge overnight?
Resting the dough for at least 2 hours (or up to 48 hours) is essential for developing flavor and texture. The cold temperature firms up the butter, preventing excessive spreading during baking, while allowing gluten to relax for a tender crumb. This also gives the vanilla and orange zest time to infuse fully, creating deeper flavor layers. Skipping this step often results in cookies that spread too much or taste flat.
Can I make these without orange zest?
The orange zest adds brightness but isn't mandatory. For a classic chocolate sable, simply omit it and increase vanilla to 1.5 tbsp for extra warmth. Other flavor boosters include ½ tsp cinnamon or ¼ tsp cardamom. The key is balancing the rich chocolate with complementary notes—vanilla alone works beautifully.
What if my sable spreads too much during baking?
Over-spreading usually means the butter melted too quickly. Ensure your butter is cold and cubed when mixing, and chill the dough discs for at least 2 hours. Bake at 350°F and check at 12 minutes—remove when edges are just golden. For extra stability, freeze dough discs for 30 minutes before baking. If using a high-altitude oven, reduce temperature to 325°F and bake 1-2 minutes longer.
How do I store these to keep them crisp?
For maximum crispness, store sable in an airtight container at room temperature for up to 3 days. Place a slice of bread in the container to absorb moisture. Refrigerate for 1 week if needed, but bring to room temperature before serving. Never store in the freezer—they'll lose their signature crunch. For gifting, wrap individually in parchment-lined boxes to maintain texture.
What's the best way to slice them for neat pieces?
Use a serrated knife and dip it in hot water between cuts to prevent crumbling. First, score the top lightly with a toothpick to create a guide. Slice while the sable is still slightly warm (after 1 hour of cooling) for cleaner edges. For perfect rectangles, chill the sable for 10 minutes before slicing—this firms the layers.