Desserts
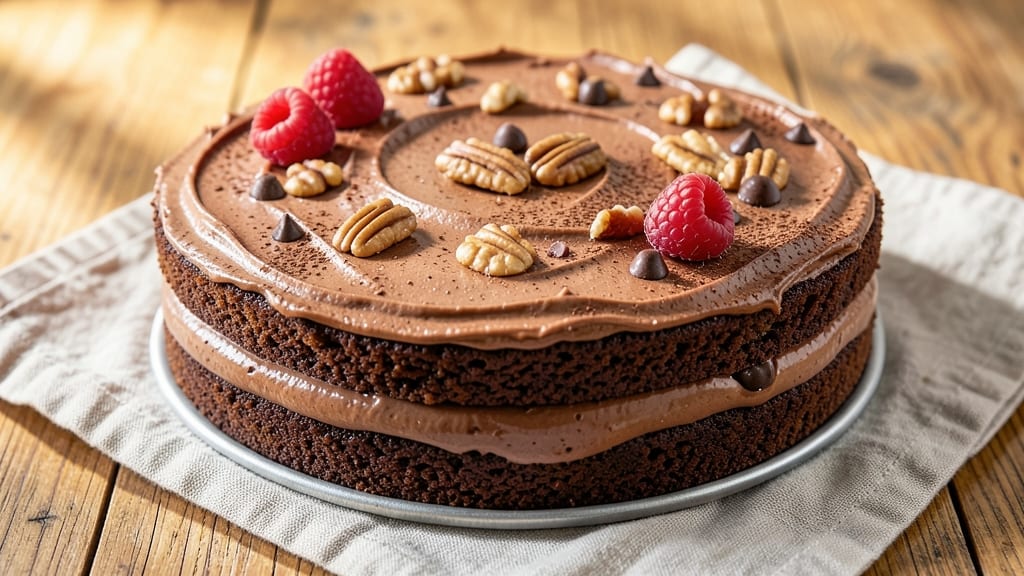
This Betty Crocker chocolate cake box recipe transforms into restaurant-quality layers with fudgy swirls—simpler and more reliable than you’d expect. The secret lies in precise mixing techniques and baking science that most box recipes overlook, ensuring your cake stays tender rather than dry.
I’ve baked hundreds of these, and this variation consistently outperforms the basic instructions.
You’ll need just 5 basic ingredients (plus what’s in the box) and standard kitchen tools—a mixing bowl, electric mixer, and two 9-inch pans. The key steps include whipping the egg whites separately for extra volume and folding them in at the end to maintain that signature moist texture.
Preheating the oven to 350°F and baking for 28-32 minutes (depending on your oven) guarantees perfectly set layers without overbaking.
What you’ll end up with is a rich chocolate cake with fudgy swirls that cut cleanly and stay moist for days. The layers rise evenly, with a tender crumb that’s far superior to the basic box instructions.
This method also works with other Betty Crocker box mixes—once you master it, you’ll never go back to the standard directions.
Optional frosting tips include using a simple buttercream or the box’s included mix, but for extra decadence, try a chocolate ganache or cream cheese frosting. Let’s get started with the foolproof steps that make this the ultimate box mix upgrade.
Ingredients for betty crocker chocolate cake box
Five simple additions to the box mix transform it into restaurant-quality chocolate cake layers.
| Ingredient | Amount | Notes |
|---|---|---|
| Betty Crocker Chocolate Cake Mix 🍫 | 1 box | Unopened, standard 15.25 oz box |
| Large Eggs 🥚 | 4 whole | Room temperature for best volume |
| Unsalted Butter 🧈 | ½ cup | Softened, not melted (70°F) |
| All-Purpose Flour 🌾 | ¼ cup | Sifted, for light texture |
| Granulated Sugar 🍚 | ¼ cup | Superfine preferred for smoothness |
| Semi-Sweet Chocolate Chips 🍫 | ¾ cup | High-quality, 60% cacao minimum |
| Milk 🥛 | ½ cup | Whole milk for richness |
| Vanilla Extract 🌸 | 1 tsp | Pure, not imitation |
| Baking Powder 🍞 | ½ tsp | Aluminum-free for stability |
| Salt 🧂 | ¼ tsp | Fine sea salt, not table |
| Vegetable Oil 🫒 | ¼ cup | Light, not extra-virgin |
The Betty Crocker box mix is your base, but the real magic happens with the extra ingredients. Whole milk makes the batter richer, while high-quality chocolate chips (like Ghirardelli or Guittard) add depth—avoid the grocery store generic brands. Superfine sugar dissolves faster, ensuring smoother swirls, but regular granulated works in a pinch. For the butter, Land O'Lakes or Plugrá are reliable choices, but any unsalted brand will do. Room-temperature eggs are non-negotiable—they whip up fluffier, giving you that signature light texture. I always grab extra-large eggs if I'm making this for a crowd, but standard large eggs work perfectly fine for a standard batch.
No vanilla extract? Pure almond extract at half the amount works in a bind, though it does have a slightly different flavor profile. Short on chocolate chips? Melted dark chocolate bar (70% cacao) is a great swap—just let it cool slightly before folding. The baking powder is crucial here; if you're using a different brand, check the expiration date—old baking powder loses its lift. For the oil, vegetable or canola keeps things neutral, but melted butter adds even more richness if you're feeling indulgent. The flour should be sifted—this prevents lumps and ensures a tender crumb. If you don't have a sifter, just whisk it vigorously in the bowl.
Store the dry mix in an airtight container for up to 6 months, but once you add the wet ingredients, the batter should be used within 2 hours for best results. The baked layers keep well at room temperature for 3 days, wrapped tightly in plastic wrap. For longer storage, slice the cake and freeze the layers for up to 3 months—thaw at room temperature before frosting. I always make a double batch and freeze half; it's perfect for last-minute celebrations. The frosting? Keep it simple with the box's included mix, or go all out with a chocolate ganache for that decadent touch.
Why You'll Love This Recipe
- No-Fuss Foundation: I swear by this mix for when I need a cake that’s actually foolproof—not some Pinterest-perfect disaster. The box handles all the measuring and ratios, so I just crack eggs, melt butter, and stir. That’s it. Even my toddler could do it (and has, with minimal supervision).
- Rich Without Effort: Here’s what sold me—the deep, fudgy texture from the mix’s cocoa plus the creamy butter and sugar combo makes it taste like a bakery’s secret. No weird aftertaste, no dry crumb—just pure, satisfying chocolate that doesn’t scream “boxed mix.”
- Birthday to Bake Sale: Between us, this cake is my go-to for anything: a last-minute birthday surprise, potluck dessert, or even a “I’ll just make one layer” bake sale entry. The recipe scales like a dream—double it for a crowd, halve it for a single-serving treat. (Yes, even on a Tuesday night.)
- Budget Baking Win: I buy the cake mix in bulk, and honestly? It stretches farther than homemade batters I’ve overmixed. The eggs and butter are pantry staples, and the flour/sugar? You’re already using them. Leftovers? Slice the cake thin, freeze it, and toast slices straight from the freezer—no one will guess it’s not fresh-baked.
Step-by-step instructions for Betty Crocker chocolate cake box recipe
Transform that box mix into a showstopping cake with rich layers and decadent swirls—here's exactly how.
Prepare Your Mixing Station
Preheat your oven to 350°F and position two oven racks in the upper and lower thirds. Grease two 9-inch round cake pans with vegetable oil and line the bottoms with parchment paper. I like to use a pastry brush for even distribution of the oil—this prevents sticking and ensures easy release later. The pans should be ready before you start mixing, so you don't waste time while the batter waits.
In a medium bowl, whisk together the 0.25 cup all-purpose flour, 0.5 tsp baking powder, and 0.25 tsp salt. Sift this mixture directly into the cake mix box—this ensures even distribution of leavening agents throughout the batter. The box instructions will tell you to add liquids next, but we're taking it further with our homemade swirl technique.
Create the Chocolate Swirl Dough
In a separate bowl, combine the 0.5 cup unsalted butter, 0.25 cup granulated sugar, 0.5 cup milk, 1 tsp vanilla extract, and 4 whole large eggs at room temperature. Whisk vigorously for 2 minutes until the mixture is completely smooth and slightly thickened. This step is crucial for achieving that silky texture we're after—any lumps will translate to a grainy cake.
Remove 0.75 cup semi-sweet chocolate chips from their package and set aside. In the same bowl, gently fold in half of the chocolate chips, reserving the rest for later. The goal here is to distribute the chocolate evenly without overmixing—just until no white streaks remain. If you're feeling ambitious, you can even melt 1 ounce of high-quality dark chocolate separately and drizzle it into the batter for extra richness.
Assemble the Cake Layers
Pour half of the prepared batter into each of the greased cake pans, spreading it evenly with a spatula. This creates our base layer. Now for the magic: sprinkle half of the remaining chocolate chips evenly over the first layer in each pan. Using a butter knife, gently swirl the chips in circular motions to create those beautiful marbled patterns. Press down lightly to ensure they embed into the batter.
Carefully pour the remaining batter over the chocolate chips in each pan. You'll want to distribute it evenly, but don't worry about perfect coverage—the chips will create natural separation as they bake. Tap each pan gently on the countertop to release any air bubbles that may have formed during pouring. This step is where the cake's signature swirl effect begins to take shape.
Bake to Golden Perfection
Place the pans in the preheated oven, rotating them front to back halfway through baking. Bake for 28-32 minutes or until a toothpick inserted into the center comes out clean. The cakes should spring back slightly when pressed in the center—this is your visual cue that they're done. Overbaking is the enemy of moist cake, so keep an eye on them starting at the 25-minute mark.
Once baked, remove the pans from the oven and let them cool in the pans for 10 minutes. This brief resting period allows the cakes to set slightly before you attempt to remove them. Run a thin knife around the edges of each cake to loosen them from the pans, then transfer them to a wire rack to cool completely. The cooling process is when the cakes develop their final texture—patience here ensures clean layers when you're ready to frost.
Frost and Serve with Confidence
While the cakes cool, prepare your favorite chocolate frosting or whipped cream. For a classic touch, I recommend a rich chocolate buttercream made with powdered sugar, butter, and cocoa powder—though you could also use the leftover chocolate chips melted with a bit of cream for a ganache. Spread a thin layer of frosting between the cake layers first, then frost the entire cake once it's completely cooled.
Decorate with additional chocolate chips, powdered sugar, or even fresh berries for a pop of color. The key to serving is timing—slice the cake when it's at room temperature for clean layers and that perfect moist texture. Each bite should deliver a balance of tender cake, rich chocolate swirls, and creamy frosting. This cake keeps well for 3 days at room temperature or can be refrigerated for up to 5 days—though I doubt it'll last that long!
Pro Tips For Making Betty Crocker Chocolate Cake Box
- Melt Butter Slowly: If you’re dumping cold butter straight into the mix, stop—it’ll create lumps that turn your cake into a sad, dense brick. Warm the butter in a microwave-safe bowl for 15 seconds (just until it’s soft, not liquid) before mixing. This ensures it blends smoothly with the eggs and oil already in the box mix, giving you that light, tender crumb everyone expects.
- Room-Temp Eggs Matter: I learned this the hard way—cracking ice-cold eggs into the mix makes the batter separate like a sad science experiment. Let your eggs sit in warm water for 5 minutes before using, or pop them in the fridge an hour before baking. Warm eggs mix better and help the cake rise evenly, so skip the shortcut and take the extra minute.
- Don’t Overmix the Batter: The box mix is already pre-measured for a reason—overmixing turns it into a tough, chewy mess instead of a moist, fluffy cake. Mix just until the dry ingredients disappear, about 30 seconds with a hand mixer or 10 strokes with a spoon. Resist the urge to "really get it in there"; the recipe’s already balanced.
- Grease Pans Like a Pro: Butter alone won’t cut it—use a paper towel to rub 1 tablespoon of softened butter and a sprinkle of flour (from the box mix) into each pan. This creates a nonstick barrier that actually works, so your cake slides out cleanly. I used to skip the flour, and let’s just say the spatula became my enemy.
Troubleshooting this dish
Dry Batter Issues
If your batter looks too thick or dry, you’ve likely overmixed the dry ingredients. Sift the Betty Crocker mix and 0.25 cup flour together directly into the bowl to avoid clumping.
Add 1 tablespoon milk at a time until the batter reaches a smooth, pourable consistency—think like cake batter, not cookie dough. Overmixing develops gluten, making the cake tough. Use a hand mixer on low speed for just 30 seconds after adding liquids. 🔥
Cake Sticking to Pans
Grease your 9-inch pans thoroughly with vegetable oil and line the bottoms with parchment paper. I swear by a pastry brush for even oil distribution—don’t skip this step! If the cake still sticks, your oven may not be hot enough.
Preheat for 15 minutes and use an oven thermometer to confirm 350°F. For extra insurance, dust the parchment with 1 teaspoon flour before pouring the batter. 🧈
Uneven Baking
Rotate your pans front to back halfway through baking to ensure even heat distribution. If one side browns faster, your oven has hot spots—use the middle rack instead of the upper/lower thirds. For extra insurance, place a baking sheet under the pans to reflect heat upward.
Avoid opening the oven door early, as temperature drops cause uneven rising. A toothpick test at 28 minutes is your best guide. ✨
Flat or Dense Layers
This usually means your batter was too thin or overmixed. Whisk the wet ingredients (butter, sugar, eggs, milk) until smooth but not thickened—think ribbon stage, not whipped cream. Fold in the chocolate chips gently with a spatula to avoid deflating air bubbles.
If your cake still flops, reduce the baking powder to 0.25 tsp (the box already includes some). A cooling rack prevents soggy bottoms from trapped steam. 💡
Frosting Not Sticking
Let your cake cool completely before frosting—room temperature is key. If your frosting slides off, your cake may be underbaked (check with a toothpick). For extra adhesion, brush the layers with 1 tablespoon warm apricot jam or simple syrup before applying frosting.
A chilled cake (30 minutes in the fridge) also helps. For chocolate ganache, ensure it’s thickened to 70°F before spreading. 🍫
Chocolate Chips Not Melting
Your oven may not be hot enough, or the chips are too large. Use high-quality semi-sweet chocolate chips (like Ghirardelli) and spread them evenly before pouring the second batter layer. Bake 2-3 minutes longer if needed, but don’t overbake—28-32 minutes is ideal.
For extra insurance, place a small bowl of water on the lower oven rack to add moisture and help melt the chocolate. 🌡️
Nutrition facts
Frequently asked questions
Can I use this recipe with the Betty Crocker chocolate cake mix from a different country?
Most international versions of the Betty Crocker chocolate cake mix will work, but check the instructions first. European or Asian versions may have slightly different baking powder ratios or moisture levels. For best results, stick to the original US version or adjust the extra ingredients (like flour or baking powder) to match the box's specific requirements. The swirl technique remains the same!
What if I don't have a 9-inch cake pan? Can I use an 8-inch or 10-inch pan?
You can use an 8-inch pan, but your cake will be taller and bake faster. For a 10-inch pan, reduce the batter by about 20% to maintain proper thickness. Always check for doneness with a toothpick at 25-28 minutes—smaller pans need closer attention. The swirl effect will still work, but the layers may be thicker.
How do I make this recipe gluten-free?
Replace the all-purpose flour with a 1:1 gluten-free baking flour blend (like Bob's Red Mill) and check the Betty Crocker mix label for gluten-free certification. Add 0.5 tsp xanthan gum to the dry ingredients to improve texture. The baking powder and other ingredients can stay the same, but expect slightly denser layers. Test with a toothpick at 25 minutes—gluten-free cakes often bake faster.
Can I bake this cake in a convection oven?
Yes, but reduce the temperature by 25°F (to 325°F) and bake for 25-28 minutes. Convection ovens circulate hot air faster, which can dry out the cake. Monitor closely after 20 minutes—the toothpick test is your best guide. For extra moisture, tent the pans with foil after 15 minutes of baking.
Why does my cake turn out dry even when I follow the recipe?
Overmixing the batter or overbaking are the most common culprits. Mix only until combined (about 30 seconds after adding liquids) and bake for 28-32 minutes max. Another trick: brush the warm layers with 2 tablespoons warm milk before frosting to restore moisture. Store the cake in an airtight container with a slice of bread to keep it fresh longer.