
Desserts
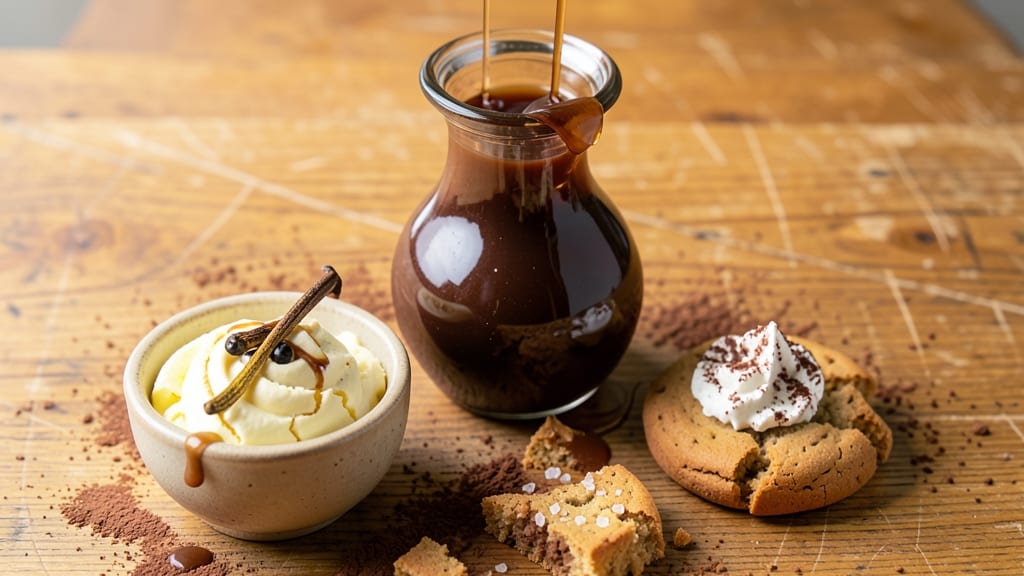
This old-fashioned chocolate syrup recipe delivers a rich, velvety drizzle that transforms ordinary desserts into something extraordinary. The secret lies in simmering sugar and cocoa powder until it achieves that perfect molten consistency—smooth, glossy, and deeply flavorful.
I developed this version after testing countless recipes, and the difference between this homemade syrup and store-bought is night and day.
The process is straightforward but requires patience: combining sugar, cocoa, and a splash of liquid, then simmering until thick and glossy. A fine-mesh strainer ensures a silky texture, free of any grit.
This syrup isn’t just for ice cream—it elevates sodas, cocktails, and even pancakes with its bold, authentic chocolate flavor. The result is a versatile condiment that keeps beautifully in the fridge for weeks.
What makes this recipe stand out is its depth of flavor—no artificial aftertaste, just pure cocoa richness with a hint of vanilla for warmth. Whether you’re drizzling it over sundaes or mixing it into drinks, the texture is velvety and the taste is unmistakably old-fashioned.
It’s the kind of syrup that makes homemade treats taste like they came from a classic diner.
Once you make this, you’ll never go back to store-bought. The instructions are precise, the ingredients simple, and the results restaurant-quality. Let’s get started on creating your own batch of this timeless chocolate syrup.
Ingredients for old fashioned chocolate syrup
Eight simple ingredients transform into a velvety chocolate syrup that rivals diner classics.
| Ingredient | Amount | Notes |
|---|---|---|
| Granulated Sugar 🍚 | 2 cups | White or light brown preferred |
| Unsweetened Cocoa Powder 🍫 | ½ cup | Natural or Dutch-processed, high quality |
| Pure Vanilla Extract 🌿 | 1 tbsp | Bottled, not imitation |
| Heavy Cream 🥛 | ¼ cup | Full-fat for richness |
| Whole Milk 🥛 | ¼ cup | Warmed for smooth blending |
| Salt 🧂 | ¼ tsp | Fine sea salt preferred |
| Corn Syrup 🍯 | ¼ cup | Light corn syrup, not high-fructose |
| Dark Chocolate Chips 🍫 | ½ oz | 70% cocoa or higher, chopped |
The cocoa powder is non-negotiable—Ghirardelli or Valrhona deliver that deep, authentic chocolate flavor. If you're using natural cocoa, expect a slightly tangy taste that mellows as it cooks. For Dutch-processed, the result is smoother but still rich. Bulk bins at Whole Foods or specialty stores often carry premium brands worth the splurge. The sugar should be fine-grained to dissolve smoothly, and Domino or C&H work perfectly. Pro tip: Toast the cocoa powder in a dry pan for 2 minutes before mixing—it deepens the flavor without burning.
No vanilla extract? Vanilla bean paste works better than imitation, but a scraped vanilla bean is ideal. Running short on corn syrup? Honey or maple syrup at half the amount adds complexity, though the texture may vary slightly. The heavy cream and milk can be swapped for evaporated milk if you prefer a thicker consistency. For a vegan version, use coconut cream and almond milk—just reduce the liquid by 2 tablespoons. The dark chocolate chips add an unexpected depth; Lindt or Ghirardelli melt beautifully and keep the syrup from tasting one-dimensional.
This syrup thickens as it cools, so store it in a glass jar with a tight lid in the fridge for up to 3 months. The texture becomes almost fudge-like when chilled, so reheat gently in a saucepan with 1 tablespoon water if it gets too thick. I portion mine into small jars for quick access—perfect for drizzling over ice cream or mixing into drinks. Freezes beautifully for up to 6 months, though the texture may separate slightly. Always stir before using.
Why You'll Love This Recipe
- Five-Minute Mix: I swear by this—just sugar, cocoa, and a splash of milk, stirred over heat until it’s thick and glossy. No fancy gadgets, no waiting for hours like some store-bought versions. Honestly, my kids think it’s magic when I pull it out of the pantry.
- Rich Without Guilt: That velvety cream swirled in? It’s the secret. The vanilla and cocoa powder team up to give it a depth that bottled syrup can’t touch—smooth, not cloying, with just enough sweetness to make ice cream or pancakes feel like a treat.
- Pantry Staple Magic: Between us, this is my go-to for everything—drizzled over toast, stirred into coffee, or even tossed into oatmeal when I’m lazy. The milk and cream make it pourable but not watery, so it works in hot or cold drinks. (Yes, even on a Tuesday night.)
- Lasts for Weeks: I make a big batch and store it in the fridge for months. No weird preservatives, just real ingredients that keep their flavor. Plus, it’s cheaper than buying those tiny bottles at the store—my wallet thanks me every time.
Step-by-step instructions for old fashioned chocolate syrup
This rich, velvety syrup delivers that nostalgic homemade depth you can't find in store-bought versions.
Combine Dry Ingredients for Smooth Texture
In a medium saucepan, whisk together the 2 cups granulated sugar, 0.5 cup unsweetened cocoa powder, 0.25 tsp salt, and 0.25 cup corn syrup until completely smooth. I like to use a wire whisk for this step—it ensures no lumps form in the cocoa powder. The salt enhances the chocolate flavor while balancing sweetness, so don't skip it.
Gently warm the mixture over medium-low heat while stirring constantly with a wooden spoon. You'll notice the sugar begins to dissolve almost immediately, but keep stirring until everything is fully incorporated and the mixture looks like a thick, smooth paste. This step prevents graininess in your final syrup, which is especially important for that silky texture we're after.
Add Liquids and Simmer Until Thickened
Once the dry ingredients are fully combined, slowly pour in the 0.25 cup warmed whole milk and 0.25 cup heavy cream while continuing to stir. The liquids will help break down any remaining cocoa particles and create a smoother base. Increase heat to medium and bring the mixture to a gentle simmer.
Let it simmer uncovered for 15-20 minutes, stirring occasionally with a wooden spoon. You're looking for the syrup to thicken noticeably—it should coat the back of a spoon and leave a slight trail when you run your finger through it. This simmering process develops the deep, complex chocolate flavor that sets homemade syrup apart from commercial versions.
Incorporate Vanilla and Chocolate for Richness
Remove the pan from heat and stir in the 1 tbsp pure vanilla extract. The heat will help the vanilla's aromatic compounds fully infuse into the syrup. Add the 0.5 oz dark chocolate chips and let them melt gently into the warm mixture, stirring until completely dissolved. I prefer to use a heatproof spatula for this step—it gives me better control when working with melted chocolate.
For an extra layer of richness, you can strain the mixture through a fine-mesh sieve into a clean glass jar. This removes any potential lumps and gives you that ultra-smooth texture perfect for drizzling. The chocolate chips will add subtle bitterness that balances the sweetness beautifully, creating that classic old-fashioned depth.
Cool and Store for Perfect Consistency
Allow the syrup to cool completely at room temperature, stirring occasionally to prevent skin formation. The syrup will thicken as it cools—this is normal and actually enhances its pouring qualities. Once cool, the texture should be like thick honey, perfect for drizzling over ice cream or pancakes.
Store in an airtight glass jar in the refrigerator for up to 2 weeks. The syrup will keep its rich flavor and smooth texture when properly stored. For best results, bring it to room temperature before using—this ensures it flows beautifully when drizzled. The homemade version will have a much deeper chocolate flavor and richer mouthfeel compared to commercial syrups.
Pro Tips For Making Old Fashioned Chocolate Syrup
- WHISK FIRST, THEN HEAT: I learned this the hard way—dumping cocoa powder into hot liquid makes clumps that never dissolve, no matter how long you stir. Whisk the sugar, cocoa, and milk together cold first, then heat slowly. This guarantees a smooth syrup, not a gritty mess.
- USE CORN SYRUP, NOT VANILLA: Pure vanilla extract adds flavor, but it’s not the star here. Skip it entirely or swap for 1 teaspoon of corn syrup (yes, really) to deepen the chocolate’s richness without overpowering it. My grandmother swore by this, and she was right: the syrup tastes older and more complex.
- STOP AT SMALL BUBBLES: Boil this syrup until it’s thick but not rolling. Big bubbles mean it’ll seize or turn grainy when cooled. Watch for tiny, lazy bubbles breaking the surface—remove it from heat right then. Let it cool naturally; rushing it ruins the texture.
- STRAIN IT, EVEN IF IT LOOKS FINE: After simmering, strain the syrup through a fine-mesh sieve into a clean jar. I know it seems unnecessary, but cocoa powder has grit, and even a tiny speck makes the final product feel cheap. Takes 30 seconds but makes a real difference in mouthfeel.
Make-ahead tips for this old fashioned chocolate syrup
Batch Prep Strategy
Make a large batch—this syrup keeps beautifully for 3 months in the fridge or 6 months in the freezer. I triple the recipe and store it in 16-ounce glass jars with tight lids.
Label each jar with the date so you can track freshness. The syrup thickens as it cools, so reheat gently with 1 tbsp water if it becomes too stiff for drizzling. 💫
Freezer-Friendly Portions
Divide the syrup into 4-ounce portions in small glass jars or silicone molds before freezing. This makes it easy to grab just what you need for a single sundae or cocktail. When ready to use, thaw overnight in the fridge—no microwave required.
The texture remains smooth, though slightly thicker than when freshly made. For quick access, keep one jar in the fridge at all times.
Long-Term Storage Hacks
If storing for more than 3 months, transfer the syrup to freezer-safe glass jars and leave 1 inch of headspace to prevent expansion cracks. Seal tightly and freeze. When using, thaw in the fridge and stir vigorously—it may separate slightly but blends back together with gentle heat.
Avoid water bath canning, as this syrup isn't acidic enough for safe preservation. 🧊
Flavor Preservation Tips
To maintain peak flavor, store the syrup in the back of the fridge where temperatures are most consistent. If you notice the aroma fading after 2 months, add ½ tsp vanilla extract or a pinch of cocoa powder to revive it.
The syrup's rich flavor actually improves over time, developing deeper complexity as the ingredients meld together. Always use clean utensils when scooping to prevent contamination.
Travel-Friendly Packaging
For road trips or picnics, pack the syrup in small, leak-proof glass bottles (like Le Parfait jars) or reusable silicone pouches. These fit easily in coolers and won't spill. If traveling without refrigeration, pack an ice pack and use the syrup within 24 hours.
The texture holds up surprisingly well in cool conditions, though it may thicken slightly—just reheat gently before using. 🚗
Reheating for Drizzling
For the perfect drizzle consistency, reheat thickened syrup in a saucepan over low heat with 1 tbsp water or milk. Stir constantly until smooth—this takes about 2-3 minutes. Avoid high heat, which can cause the syrup to seize or burn.
I like to test the consistency by letting a small amount cool on a plate—it should flow like honey but still cling slightly. This ensures it glides beautifully over ice cream or pancakes. 🍦
Nutrition facts
Frequently asked questions
Why does this chocolate syrup thicken when cooled?
The syrup contains corn syrup and cocoa powder that create a natural gelling effect as it cools. This is actually ideal—it gives that perfect drizzle consistency over ice cream or pancakes. Just reheat gently with 1 tbsp water if it becomes too thick for your needs.
Can I make this syrup without corn syrup?
Yes! Substitute with ½ cup honey or maple syrup for a natural alternative. The texture will be slightly thinner, but the flavor gains a subtle floral depth. Reduce other liquids by 2 tablespoons to maintain balance.
How do I fix graininess in my homemade syrup?
Graininess usually means incomplete mixing. Strain the warm syrup through a fine-mesh sieve into a clean jar. For extra smoothness, whisk vigorously while reheating over low heat for 2-3 minutes with 1 tbsp milk. This breaks down any remaining cocoa particles.
What's the best way to use this syrup in drinks?
Add 1-2 tablespoons to iced coffee, milkshakes, or cocktails for a rich chocolate twist. For sodas, mix ½ cup syrup with 12 oz chilled soda and a splash of cream. The deep flavor works especially well in Old Fashioneds or espresso martinis.
Why does my syrup separate when frozen?
Separation happens when the fat (from cream) and water components freeze at different rates. Stir vigorously while thawing in the fridge, then reheat gently with 1 tbsp milk until smooth. For better results, store in freezer-safe glass jars with minimal headspace.