Desserts
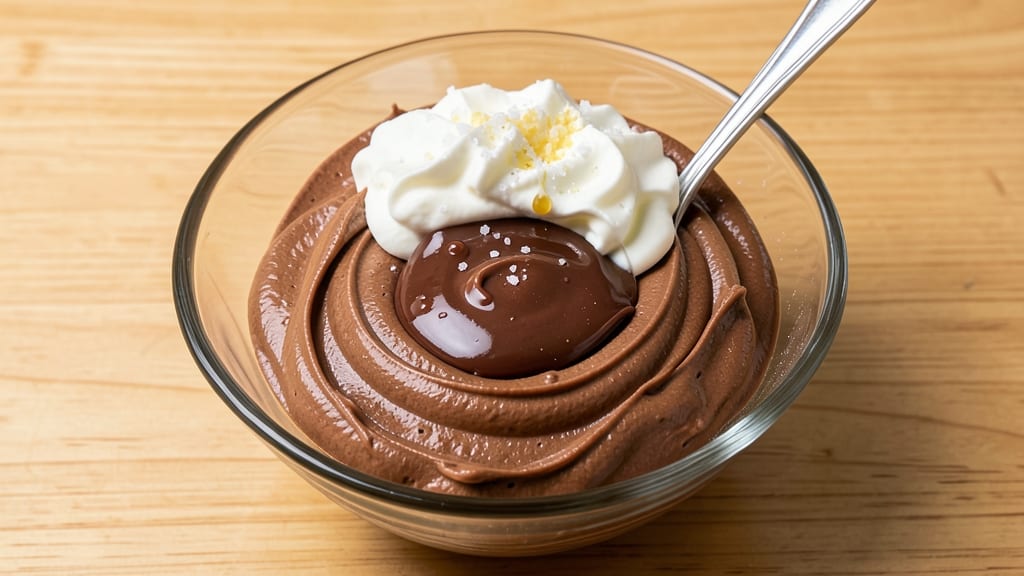
This Hershey's chocolate buttercream frosting recipe delivers silky-smooth swirls that stay perfectly stable—no grainy texture or separation, no matter how warm your kitchen gets. The secret lies in precise ratios of butter, sugar, and melted chocolate, combined with a technique that ensures airy lightness without sacrificing richness.
I've tested countless variations to perfect this version, which maintains its shape for piping while still spreading beautifully for layering cakes.
The key to professional results starts with room-temperature ingredients—this prevents lumps and ensures the frosting whips to a flawless consistency. Using Hershey's chocolate bars (not chips) creates a smoother base, while powdered sugar provides stability without altering the flavor.
What makes this recipe stand out is its ability to hold swirls and rosettes while remaining tender enough to melt in your mouth.
Once you've mastered the mixing technique, you'll achieve frosting that's ideal for decorating sheet cakes, cupcakes, or even piping onto cookies. The recipe yields about 3 cups, perfect for a standard 9x13-inch cake or 24 cupcakes.
Store leftovers in an airtight container in the refrigerator for up to 5 days, or freeze for longer storage—just rewhip briefly before use.
This buttercream keeps its structure at room temperature for 2-3 hours, making it ideal for outdoor events where temperature fluctuations might challenge other frostings. The rich chocolate flavor pairs beautifully with vanilla cakes, red velvet, or even as a filling for chocolate desserts.
Let's get started on creating your most stable, most delicious buttercream yet.
Ingredients for hershey's chocolate buttercream frosting
Six ingredients, three cups of dreamy chocolate frosting—no lumps, no separation, just perfect swirls.
| Ingredient | Amount | Notes |
|---|---|---|
| Hershey's Milk Chocolate Bars 🍫 | 8 oz | Smooth melting, not chips |
| Unsalted Butter 🧈 | 1 cup | Room temperature, full-fat |
| Powdered Sugar 🍚 | 3 cups | Sifted for smooth texture |
| Heavy Whipping Cream 🥛 | ½ cup | Cold, full-fat preferred |
| Vanilla Extract 🌿 | 1 tbsp | Pure, not imitation |
| Diamond Crystal Kosher Salt 🧂 | ¼ tsp | Fine grain preferred |
| Distilled Water 💧 | 1 tbsp | Room temperature |
The chocolate bars are non-negotiable—Hershey's melts smoother than chips, and the milk chocolate gives that classic Hershey's flavor without bitterness. Grab a family-size bar from the grocery store chocolate aisle (the ones in the refrigerated section, not the candy bar aisle). Butter needs to be room temperature—press your finger into it; if it leaves a dent, it's ready. Powdered sugar? Diamond Crystal is my go-to since it's finer and dissolves better. The heavy whipping cream should be cold when you add it, but not icy—just pulled from the fridge. Vanilla extract matters too: pure Madagascar bourbon if you're fancy, but the cheap stuff works fine here.
No Hershey's bars? Dove chocolate bars are the closest substitute (same milk chocolate profile), but you'll lose that signature Hershey's taste. Butter not room temperature? Microwave it in 20-second bursts until just soft—don't overdo it or it'll turn greasy. Short on powdered sugar? Granulated sugar at 1:1 ratio, but your frosting will be denser. The heavy whipping cream can be swapped for half-and-half in a pinch, though it won't whip as high. Salt is key—skip it and your frosting will taste flat. And if you're out of vanilla, vanilla bean paste at half the amount adds flecks of flavor (but strain it first).
This frosting holds up beautifully—2-3 hours at room temperature before it starts to soften. For longer storage, refrigerate in an airtight container for up to 5 days, or freeze for 3 months. To reuse, let it sit at room temperature for 10 minutes, then rewhip with a hand mixer for 1-2 minutes. Pro tip: Divide into two containers—one for piping, one for spreading—to keep it stable longer. The chocolate base keeps for 1 week refrigerated if you make it ahead, so prep the night before for stress-free decorating.
Why You'll Love This Recipe
- No-Mess Mixing: I swear by this method—just melt the chocolate and butter together, then fold in the whipped cream and vanilla. No sifting powdered sugar, no sticky hands, just smooth, creamy magic in minutes.
- Rich, Unapologetic Chocolate: That Hershey’s bar isn’t just any chocolate—it’s the kind with a crunch when you melt it in, giving this frosting this addictive texture. The vanilla ties it all together like a warm hug.
- Cake or Cupcake Hero: Slather it on sheet cakes, pipe it into cupcakes, or even drizzle it over ice cream. It’s my go-to for birthdays, potlucks, or when I just need dessert now—no excuses.
- Budget-Friendly Luxury: You’re basically making gourmet frosting for pennies. A few chocolate bars, a stick of butter, and cream? That’s it. And it keeps for days in the fridge, so I’m always covered.
Instructions for Hershey's chocolate buttercream frosting
Here's how to make ultra-stable swirls that stay creamy and never separate—no guesswork, just perfect results.
Melt the Hershey's Milk Chocolate Bars
Break the 8 oz Hershey's Milk Chocolate Bars into small pieces and place them in a heatproof bowl set over a pot of simmering water. Keep the heat at a gentle simmer—you want the water to bubble softly, not boil vigorously. Stir occasionally until the chocolate melts completely, about 5-7 minutes. The mixture should look smooth and glossy, with no streaks of unmelted chocolate remaining.
Remove the bowl from the heat and let the melted chocolate cool slightly to 110°F—just warm enough to handle but not hot. This temperature ensures the chocolate incorporates smoothly without seizing up the butter later. If it cools too much, warm it gently over low heat for 30 seconds to bring it back to this ideal consistency.
Whip the Unsalted Butter and Powdered Sugar
In a stand mixer fitted with the paddle attachment, beat the 1 cup Unsalted Butter on medium speed until completely smooth and creamy, about 2-3 minutes. This step is critical—any lumps will create graininess in the final frosting. Once the butter looks pale and fluffy, gradually add the 3 cups Powdered Sugar in a slow, steady stream to avoid clouding the mixture.
Continue beating on medium speed for 3-4 minutes until the sugar is fully incorporated and the mixture looks light and airy. Scrape down the sides of the bowl with a spatula to ensure even mixing. The buttercream should be thick but still pipeable at this stage—if it's too stiff, we'll adjust it later with the cream and water.
Incorporate the Melted Chocolate
With the mixer running on low speed, slowly pour the melted chocolate into the buttercream. Let it mix for 1-2 minutes to combine completely, then increase the speed to medium and beat for another 3-4 minutes until the mixture is smooth and homogeneous. You're looking for a rich, velvety texture with no streaks of chocolate or butter visible.
Here's the thing—if the frosting starts to look too thin, we'll fix it in the next step. But if it's still too thick, add 1 teaspoon of the distilled water at a time until it reaches a smooth, spreadable consistency. The goal is a frosting that holds its shape when piped but still swirls beautifully without cracking.
Add Cream, Vanilla, and Salt for Stability
Reduce the mixer speed to low and gradually add the 0.5 cup Heavy Whipping Cream, mixing just until combined. Then add the 1 tbsp Vanilla Extract and 0.25 tsp Diamond Crystal Kosher Salt, mixing for another 1-2 minutes on medium speed. The salt might seem odd, but it balances the sweetness and helps stabilize the emulsion—trust the process.
Finally, add the 1 tbsp Distilled Water and mix for 30 seconds to bring everything together. The frosting should now be silky, smooth, and perfectly pipeable. If it's still too thick, add another ½ teaspoon of water and mix briefly. For extra stability, chill the frosting in the refrigerator for 15-20 minutes before using—this helps prevent any potential separation later.
Test and Adjust for Perfect Swirls
Transfer the frosting to a piping bag fitted with a star tip for decorative swirls. Pipe a small amount onto a plate and let it sit for 5 minutes to observe how it behaves. The frosting should hold its shape without sliding or melting too quickly. If it's too soft, chill it for another 10 minutes before proceeding.
For ultra-stable swirls, pipe the frosting onto a cold cake or board—this helps it set faster. Use a small offset spatula to create smooth, even swirls by dragging the spatula through the frosting in a gentle back-and-forth motion. If the frosting starts to look grainy, give it a quick mix in the stand mixer on low speed to restore its silky texture.
Pro Tips For Making Hershey'S Chocolate Buttercream Frosting
- Chop Chocolate Faster: Use a food processor—just pulse those Hershey’s bars for 10-15 seconds until they’re tiny, uneven chunks. The uneven edges melt faster and create pockets of gooey chocolate in your frosting, not some sad, clumpy mess that won’t blend right.
- Whip Cream Cold: Chill your heavy whipping cream in the fridge for at least 30 minutes before using—yes, even if you’re impatient. Room-temperature cream turns into buttercream faster than you can say “disaster,” and you’ll end up with grainy, separated frosting that looks like it was made by a toddler.
- Sift That Sugar: Powdered sugar clumps like a drama queen if you don’t sift it first. Use a fine-mesh sieve and tap it gently over a bowl—this keeps your frosting silky smooth, not gritty enough to sandpaper your cake layers. (Trust me, you’ll notice the difference.)
- Melt Butter Slow: Warm the butter in a microwave for 20-second bursts, stirring between each, until it’s just melted—not hot enough to make your kitchen smell like a drive-thru. Overheating butter seizes the powdered sugar, turning your frosting into a stiff, dry brick that won’t pipe worth a damn.
Essential equipment for hershey's chocolate buttercream frosting
Stand Mixer Essentials
Your stand mixer is the MVP here—I use my KitchenAid Artisan Series with the paddle attachment for this recipe. The paddle ensures smooth incorporation of ingredients without over-aerating the frosting. If you're using a hand mixer, expect to work in 2-minute bursts with extra scraping between batches.
The bowl capacity matters too: a 5-quart bowl gives you room to mix without splattering. 💡
Heatproof Mixing Bowl
A stainless steel or glass mixing bowl is non-negotiable for melting the chocolate. I use a 4-cup Pyrex bowl because it conducts heat evenly and resists warping. Never use plastic—it can melt or leach chemicals when exposed to high heat.
For double batches, grab a second bowl to keep prep organized. The bowl should fit snugly over your saucepan for stable double-boiler setups. ✨
Precision Measuring Tools
Accurate measurements are everything with buttercream. Invest in a digital kitchen scale (like the OXO Good Grips) for the butter and chocolate—this eliminates guesswork. For powdered sugar, use a fine-mesh sifter to avoid clumps.
A liquid measuring cup with clear markings ensures you nail the 0.5 cup heavy cream and 1 tbsp water precisely. I keep a small bowl nearby to catch any overflow when sifting. 🔥
Piping Bags & Tips
For professional swirls, use disposable piping bags (like Ateco brand) with a Wilton 1M tip for classic rosettes or a Wilton 122 tip for smooth borders. If you're spreading frosting, a flexible offset spatula (like Michael Roberts) works wonders.
Pro tip: Cut a small corner off the piping bag for easier filling. Keep an extra bag handy—frosting can clog tips if it sits too long. 💫
Thermometer for Chocolate
A candy or instant-read thermometer (like Thermoworks Thermapen) ensures your melted chocolate hits the perfect 110°F temperature. This prevents butter seizing when combined. If you don’t have one, test with your finger—the chocolate should feel warm but not hot enough to burn your skin.
Overheating chocolate introduces moisture, which can cause separation later. 🌡️
Storage Containers
For leftovers, use glass airtight containers (like Rubbermaid Brilliance) to maintain freshness. Divide frosting into two portions: one for piping (keep at room temp) and one for spreading (refrigerate).
Label containers with dates—this frosting lasts 5 days refrigerated or 3 months frozen. For freezing, use silicone molds to portion frosting in dollops for easy thawing. 📅
Nutrition facts
Frequently asked questions
Why does my chocolate frosting sometimes separate?
The most common causes are melted chocolate that's too hot (above 115°F) or butter that's not fully incorporated. Always cool melted chocolate to 110°F before mixing, and whip butter until completely smooth. The heavy cream and water in this recipe help stabilize the emulsion—don't skip them! If separation happens, whisk vigorously with a hand mixer to restore smoothness.
Can I make this frosting without a stand mixer?
Yes! Use a hand mixer or even a whisk in a large bowl. Work in 2-minute bursts between scrapes, and mix more slowly to prevent splattering. The key is patience—whisking by hand requires extra time to fully incorporate the powdered sugar and melted chocolate. For best results, chill the frosting for 15 minutes between mixing stages to help it thicken.
How do I get sharper swirls when piping?
Chill your piping bag and tips in the freezer for 10 minutes before using, and pipe onto a cold surface. Use a Wilton 1M tip for classic rosettes, and squeeze the bag gently to control pressure. For extra definition, dip your fingers in cold water before smoothing swirls with an offset spatula. Work quickly—warm frosting softens faster and loses its shape.
What's the best way to store leftovers?
Divide frosting into two airtight containers: one for piping (keep at room temp for 2-3 hours) and one for spreading (refrigerate). Label with dates—this frosting lasts 5 days refrigerated or 3 months frozen. To reuse, let refrigerated portions sit at room temperature for 10 minutes, then rewhip briefly. For freezing, portion into 1-tablespoon dollops for easy thawing.
Can I substitute Hershey's chocolate with something else?
Dove milk chocolate bars work best as a substitute—they melt similarly and maintain the creamy texture. For a slightly richer flavor, try Ghirardelli milk chocolate squares, but they may require 1 extra tablespoon of powdered sugar to compensate for their higher fat content. Avoid chocolate chips—they contain stabilizers that can alter the frosting's consistency.