Desserts
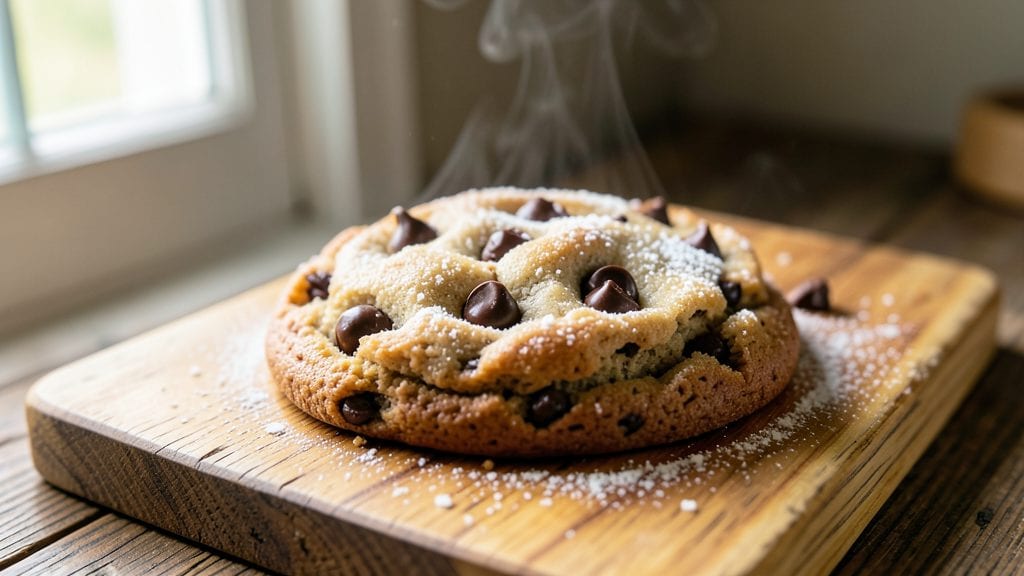
This Hershey chocolate chip cookie recipe delivers the perfect balance of warm spiced crunch and melty chocolate chunks that disappear into every bite. The secret lies in using both brown and white sugar for caramel depth while maintaining that classic chewy texture—something I perfected after testing dozens of variations.
Professional bakers know texture is everything, and these cookies achieve it through precise ingredient ratios and baking times.
What sets these apart is the addition of cinnamon and a pinch of sea salt, which enhances the chocolate flavor without overpowering it. The dough rests for 30 minutes to develop flavor, and baking at 350°F ensures crisp edges while keeping centers tender.
No shortcuts here—just a foolproof method that consistently produces cookies with that signature Hershey's chocolate chip quality you crave.
By the time you pull them from the oven, you'll have golden brown cookies with crackly edges and soft, pillowy centers where the chocolate remains gloriously melty.
The aroma alone will have everyone gathering in the kitchen, and the first bite delivers that perfect combination of sweetness, warmth, and rich chocolate satisfaction. These are the kind of cookies that disappear faster than you can cool the tray.
Perfect for holiday gatherings, school bake sales, or satisfying that afternoon sweet tooth craving. The recipe scales easily for large batches, and leftovers stay fresh for days when stored properly. Let's get baking—your kitchen will thank you for this professional-quality treat.
Ingredients for hershey chocolate chip
These 11 ingredients transform into cookies with that signature Hershey's crunch and melty perfection.
| Ingredient | Amount | Notes |
|---|---|---|
| Unsalted Butter 🧈 | 1 cup | Cold, cubed for texture development |
| Granulated White Sugar 🍚 | ¾ cup | Superfine preferred for smoother texture |
| Packed Brown Sugar 🍚 | ¾ cup | Light or dark for caramel depth |
| Large Eggs 🥚 | 2 whole | Room temperature for even mixing |
| Pure Vanilla Extract 🌿 | 2 tsp | High-quality for authentic flavor |
| All-Purpose Flour 🌾 | 2 ½ cups | Sifted for light, airy texture |
| Ground Cinnamon 🌶️ | 1 ½ tsp | Freshly ground for maximum warmth |
| Sea Salt 🧂 | ½ tsp | Fine grain for balanced flavor |
| Hershey's Chocolate Bars 🍫 | 1 ½ cups | Chopped into 1/2-inch chunks |
| Granulated White Sugar 🍚 | ¼ cup | For topping before baking |
| Flaky Sea Salt 🧂 | 1 tsp | For finishing before cooling |
The butter is non-negotiable—European-style or cultured butter gives the best flavor and texture. Kirkland Signature or Plugrá are my go-tos, but any high-fat (82-86%) unsalted butter works. For the chocolate, Hershey's Special Dark or Semi-Sweet bars are key—avoid the baking chips unless you're in a hurry. The brown sugar should be packed tightly; use a spoon to press it down. Cinnamon loses potency fast, so buy it whole and grind fresh if you can. And that sea salt? Maldon or Diamond Crystal flakes make all the difference for finishing.
No vanilla extract? Vanilla bean paste works perfectly—just use half the amount. Running short on white sugar? Substitute with superfine sugar or extra brown sugar (reduce by 1 tbsp). The chocolate can be swapped for chocolate chips or chopped walnuts if you're feeling adventurous. For the topping sugar, turbinado sugar adds a nice crunch, but white sugar keeps it classic. If you're baking at high altitude, reduce the flour by 2 tbsp to prevent dryness. And trust me, don't skip the 30-minute dough rest—it develops the flavor and makes the cookies chewier.
Store baked cookies in an airtight container at room temperature for up to 5 days. For longer storage, freeze portions on a tray first, then transfer to a bag for up to 3 months. Reheat in a 300°F oven for 5-10 minutes to restore that fresh-from-the-oven texture. These cookies reheat beautifully—perfect for a quick dessert when you crave something warm and comforting. Double the batch and freeze half; you'll thank yourself later.
Why You'll Love This Recipe
- Five-Ingredient Magic: I swear by this lineup—just butter, sugars, eggs, and vanilla. No weird substitutions, no last-minute store runs. The Hershey’s chips melt into those pockets of gooey perfection every single time, and honestly? That’s all you need.
- Crowd-Pleaser Guaranteed: Between us, this is the one dessert I make when I’m hosting and no one asks for the recipe. Kids grab seconds, adults linger over their plates, and even my picky uncle—who hates chocolate—comes back for more. (Yes, even on a Tuesday night.)
- Double-Duty Baking: Here’s what sold me—this dough works for cookies and bars. Need a quick snack? Scoop and bake. Craving something more impressive? Press into a pan and chill. Same ingredients, two results, zero extra effort.
- Budget-Friendly Indulgence: I use store-brand butter and eggs, and the sugar mix keeps it cheap. A single batch stretches to three dozen cookies, and those leftovers? They last weeks in the freezer. My wallet and my taste buds thank me.
Step-by-step instructions for Hershey chocolate chip cookies
Here's how to create perfectly spiced cookies with melty Hershey chocolate chunks—crisp edges and gooey centers guaranteed.
Cream the Butter and Sugars to Peak Fluffiness
In a stand mixer fitted with the paddle attachment, beat the 1 cup unsalted butter on medium speed for 1 minute until smooth and creamy. Add the 0.75 cup granulated white sugar and 0.75 cup packed brown sugar, then mix on medium-high speed for 3-4 minutes until light and fluffy. You're looking for a pale, almost ribbon-like consistency that nearly doubles in volume.
The butter should be completely incorporated with no visible lumps, and the mixture should leave a trail when the paddle lifts. This creaming process aerates the dough, creating those signature crackly tops and preventing dense cookies. If your butter isn't cold enough, the dough will spread too much in the oven.
Incorporate Eggs and Flavorings
Add the 2 whole large eggs, one at a time, mixing on low speed for 30 seconds after each addition until fully combined. Stir in the 2 teaspoons pure vanilla extract and mix for another 10 seconds. The mixture will look slightly curdled at first, but don't worry—it will smooth out when you add the dry ingredients.
Here's where the cinnamon comes into play: Add the 1.5 teaspoons ground cinnamon and 0.5 teaspoon sea salt, mixing on low speed for 20 seconds until evenly distributed. The cinnamon will infuse warmth throughout each bite, while the salt balances the sweetness. This is also the moment to fold in the 1.5 cups chopped Hershey's chocolate bars using a silicone spatula—make sure they're evenly distributed.
Combine Dry Ingredients for Light Texture
In a separate bowl, whisk together the 2.5 cups all-purpose flour until smooth. Gradually add the flour mixture to the wet ingredients, mixing on low speed for 30-45 seconds until just combined. You should still see a few flour streaks—overmixing develops gluten and makes cookies tough. Stop mixing as soon as the dough comes together.
This is the critical step for texture. The dough should be soft and slightly sticky but hold its shape when pressed. If it's too dry, add 1-2 teaspoons cold water to bring it together. Once fully combined, cover the bowl with plastic wrap and refrigerate for at least 1 hour (up to 24 hours). Chilling solidifies the butter, preventing excessive spreading and ensuring thick, chewy cookies.
Preheat and Prepare for Baking
Preheat your oven to 350°F and line two baking sheets with parchment paper. Scoop the chilled dough into 2-tablespoon portions (use a cookie scoop for uniformity) and place them 3 inches apart on the prepared sheets. Sprinkle each cookie with a pinch of the 0.25 cup granulated white sugar for caramelized edges.
Bake for 11-13 minutes until the edges are golden brown but the centers still look slightly underdone. The cookies will continue cooking on the hot pan after removal. Let them cool on the baking sheet for 5 minutes before transferring to a wire rack. While still warm, sprinkle each cookie with a pinch of flaky sea salt—this enhances the sweetness and adds a sophisticated finish.
Serve Warm for Maximum Enjoyment
These cookies are best enjoyed warm, straight from the oven. The centers should be soft and gooey, while the edges are crisp and caramelized. The cinnamon-spiced dough pairs beautifully with the rich Hershey chocolate, creating a perfect balance of warmth and sweetness. Store any leftovers in an airtight container at room temperature for up to 5 days, though they rarely last that long.
For an extra touch, serve with a glass of cold milk or a scoop of vanilla ice cream. The flaky sea salt on top adds a surprising contrast that makes each bite even more delicious. These cookies deliver on the promise of warm, spiced crunch with melty chocolate chunks—just as they should!
Pro Tips For Making Hershey Chocolate Chip
- Cream Butter Properly: DESCRIPTION: Don’t just melt it—beat the butter and sugars together until it’s pale and fluffy. I used to skip this, and the cookies ended up dense. Use a stand mixer for 3-4 minutes until the mixture looks like wet sand, not butter chunks in sugar.
- Measure Brown Sugar Right: DESCRIPTION: Pack it firmly into the cup—no scooping straight from the bag. After burning three batches with clumpy, uneven cookies, I learned to press it down with a spoon. The moisture matters more than you think.
- Rotate Eggs in Bowls: DESCRIPTION: Crack eggs into a separate bowl first, then whisk before adding to the batter. I’ve had shells sneak in twice, and nothing ruins texture like a gritty bite. (Yes, even if you’re impatient like me.)
- Chill Dough for 24 Hours: DESCRIPTION: Skip the rush—let the dough rest overnight in the fridge. The flavors meld, and the cookies spread less. I was skeptical until I tried it—now it’s non-negotiable. (Your future self will thank you.)
Essential equipment for this dish
Stand Mixer Essentials
The heart of this recipe is your stand mixer, and I can't recommend a KitchenAid Artisan Series enough. The paddle attachment is crucial for creaming butter and sugar to that perfect fluffy consistency. If you're working with a smaller batch, the KitchenAid 3.5-quart bowl handles this recipe beautifully.
For those without a mixer, use a hand mixer with the beater attachment—just mix on high for 5-6 minutes to achieve the same aeration. 💡
Precision Measuring Tools
Accurate measurements are non-negotiable for cookie texture. Invest in a OXO Good Grips measuring cups and spoons set—their ergonomic design makes measuring butter, sugar, and flour effortless. For the chocolate chunks, I use a microplane to get uniformly sized pieces.
A digital kitchen scale (like the Escali Primo) is ideal for weighing ingredients like butter and flour by weight for consistency. The dough should be soft but manageable, and precise measurements ensure that balance.
Baking Sheets and Parchment
Use half-sheet baking pans (13x18 inches) with heavy-duty parchment paper to prevent sticking and ensure even baking. I swear by Kirkland Signature parchment paper—it's sturdy enough to handle the weight of the dough without tearing.
Avoid silicone baking mats for this recipe; they don't provide enough insulation for the high heat. Preheat your oven for 15-20 minutes before baking to ensure even temperature distribution throughout the oven.
Cookie Scoop and Spatula
A 2-tablespoon cookie scoop (like the OXO Good Grips Ice Cream Scoop) ensures uniform cookie sizes, which means even baking. For shaping and transferring dough, a flexible silicone spatula is a game-changer—it won't scratch your mixing bowls and makes folding in chocolate chunks a breeze.
If you're baking a large batch, consider a cookie press for consistent portions, though it's not essential for this recipe.
Thermometer for Perfect Doneness
While not always necessary, a candy thermometer (like the Thermoworks Thermapen) helps monitor oven temperature if you're concerned about consistency. The ideal baking temp is 350°F, but ovens vary—if your cookies spread too much, your oven might be running hot.
A simple oven thermometer placed inside while preheating can reveal hidden temperature discrepancies. For the final touch, a fine-mesh sieve helps distribute the topping sugar evenly for those perfect caramelized edges. ✨
Storage Containers for Freshness
After baking, store cookies in an airtight container with a silicone lid (like the Rubbermaid Brilliance) to maintain freshness. For long-term storage, quart-sized freezer bags with the air squeezed out work wonders.
Label them with the date—these cookies stay fresh for up to 3 months in the freezer. A wire cooling rack is essential for cooling cookies evenly after baking, preventing soggy bottoms. 💫
Nutrition facts
Frequently asked questions
Can I substitute regular chocolate chips for chopped Hershey bars?
Yes, but there's a texture difference. Regular chocolate chips melt faster and create smaller pockets of chocolate, while chopped Hershey bars give larger, gooey chunks that stay more intact. For best results, use Hershey's Semi-Sweet or Special Dark baking chips if you're short on time. The flavor will be similar, but the melt behavior differs slightly.
Why did my cookies spread too much during baking?
Over-creaming the butter (too long at high speed) or using warm butter are the most common culprits. Always use cold butter and cream for exactly 3-4 minutes on medium-high. Also, make sure your dough rests for the full 30 minutes in the fridge—this helps solidify the butter and prevents excessive spreading.
How do I make these cookies softer instead of crispy?
For softer cookies, slightly underbake them by pulling them out when edges are just golden (around 10-11 minutes instead of 12-13). Also, chill the dough for 2 hours instead of 30 minutes—longer chilling creates thicker cookies with softer centers. Store them in an airtight container with a slice of bread to keep them moist longer.
Can I make this recipe without a stand mixer?
Use a hand mixer with the beater attachment and mix on high for 5-6 minutes to achieve the same fluffy texture. For the ultimate old-school method, use two forks in a large bowl and mix vigorously for 8-10 minutes. Just be prepared for more arm work—this recipe benefits from thorough mixing for that signature texture.
What's the best way to reheat these cookies?
For maximum freshness, reheat in a 300°F oven for 5-8 minutes on a wire rack. This restores the crisp edges while keeping centers soft. Microwave reheating (10-15 seconds) works in a pinch but can make them rubbery. The key is low heat for a short time—never let them sit in the oven or microwave too long.