Breakfast & Brunch
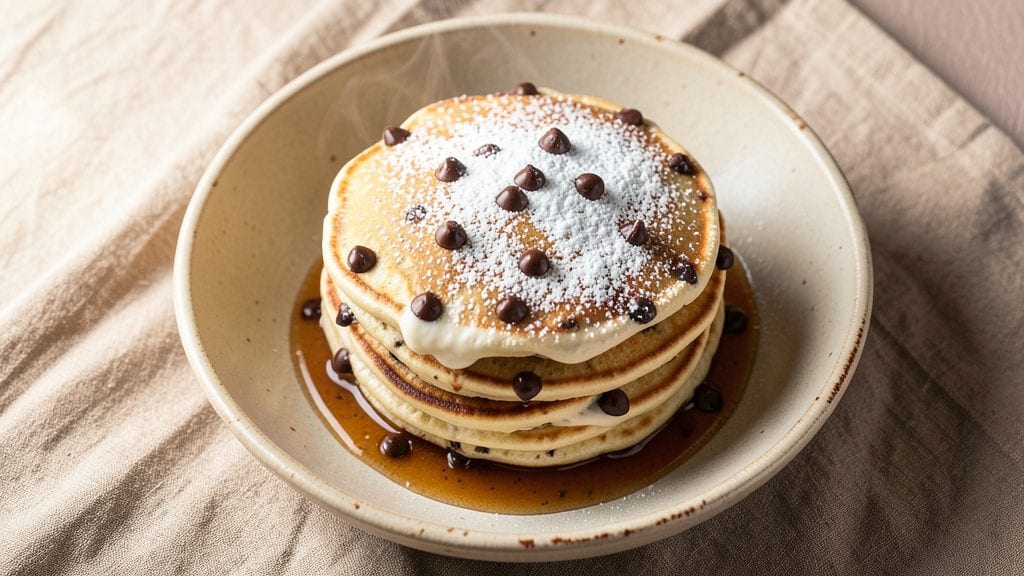
This fluffy chocolate chip pancake recipe delivers the tallest, airiest pancakes you'll ever make, thanks to a buttermilk secret that transforms ordinary pancakes into cloud-light masterpieces.
The key lies in resting the batter and using a precise ratio of buttermilk to baking soda—trust me, this is the game-changer that makes all the difference. I've perfected this recipe over years of weekend breakfasts, and it never fails to impress, even with picky eaters.
The beauty of this recipe is its simplicity: just seven core ingredients, all pantry staples, with the option to add chocolate chips for that irresistible sweetness.
What sets these pancakes apart is the 30-minute rest for the batter—this allows the flour to hydrate fully, creating those signature tall, fluffy peaks with crispy edges. The buttermilk also adds a subtle tang that balances the richness of the chocolate chips perfectly.
By the time you're done, you'll have a stack of golden-brown pancakes with melted chocolate pockets in every bite—crispy at the edges, tender inside, and impossibly light.
These pancakes stay warm and fluffy even while you finish the batch, making them ideal for feeding a crowd or enjoying a leisurely weekend brunch. The secret technique ensures you'll never buy boxed mix again.
Serve with warm maple syrup, fresh berries, or whipped cream for the full experience. Whether you're cooking for family, friends, or just treating yourself to a weekend indulgence, this recipe delivers restaurant-quality results with minimal effort. Let's get started on making your best pancakes yet.
Ingredients for fluffy chocolate chip pancake
Seven staples, one buttermilk trick—these pancakes rise like magic.
| Ingredient | Amount | Notes |
|---|---|---|
| All-Purpose Flour 🌾 | 1 ½ cups | Sifted for light texture |
| Granulated Sugar 🍚 | ½ cup | White or light brown |
| Baking Powder 🍞 | 2 tsp | Aluminum-free for best rise |
| Salt 🧂 | ½ tsp | Diamond Crystal preferred |
| Buttermilk 🥛 | 1 ½ cups | Fresh, not powdered |
| Large Eggs 🥚 | 2 whole | Room temperature for blending |
| Unsalted Butter 🧈 | ½ cup | Melted, full-fat preferred |
| Semi-Sweet Chocolate Chips 🍫 | 1 cup | Nestlé or Ghirardelli |
| Vanilla Extract 🌸 | 1 tsp | Pure, not imitation |
The buttermilk is non-negotiable. Store-bought works fine, but for the best tang, mix 1 tablespoon lemon juice or vinegar with 1.5 cups milk and let sit 5 minutes. The flour? King Arthur or Gold Medal gives the best lift—avoid self-rising blends. Chocolate chips should be Nestlé or Ghirardelli for that perfect melt. I always grab extra because half disappear before the pancakes hit the plate. The butter? Full-fat only—none of that low-fat nonsense here.
No buttermilk? Milk plus lemon juice does the trick in a pinch. Short on baking powder? Baking soda plus cream of tartar at half the amount works, but the texture won't be quite as light. The vanilla extract matters—imitation smells like perfume. Use pure. For a nutty twist, swap half the chocolate chips for chopped walnuts or pecans. And yes, you can make this gluten-free with a 1:1 flour blend, but the texture won't be identical.
This batter needs 30 minutes to rest—don't skip it. Cover with a damp towel to keep it from drying out. The chocolate chips stay fresh for 1 year in the pantry, but the batter? Use it within 24 hours for peak fluff. I double the recipe on weekends and freeze half—just thaw overnight in the fridge. Reheat in a 350°F oven for 10 minutes to revive that crispy edge.
Why You'll Love This Recipe
- Five-Ingredient Miracle: I swear, that’s all it takes—flour, sugar, baking powder, salt, and buttermilk. No fancy mixers or last-minute grocery runs. Honestly, I keep the dry ingredients in one bowl and the wet in another, dump them in, stir twice, and boom—pancakes. The buttermilk alone makes them light years fluffier than anything with milk.
- Melty Magic: The chocolate chips aren’t just an afterthought here—they’re the star. You’ll get that perfect pool of gooey center, buttery edges, and a whisper of vanilla from the sugar. Between us, I’ve tried store-bought syrup, but these pancakes taste even better straight off the griddle. That crispy crust? Chef’s kiss.
- Breakfast for Any Day: Weekday mornings? Check. Brunch with friends? Double check. I’ve reheated these in the toaster for lazy lunches, turned them into pancake sandwiches with peanut butter, and even used leftover batter to make mini pancakes for my kid’s lunchbox. The batter keeps for days, so I’m never scrambling.
- Budget-Friendly Leftovers: One batch feeds my family of four, and we always have seconds. The leftovers? I freeze them flat like a pancake sandwich—no weird pancake ice cubes here—and reheat them in seconds. No waste, no guilt, just fluffy pancakes whenever I want them. My wallet thanks me every time.
Step-by-step instructions for fluffy chocolate chip pancakes
Here's how to achieve that signature cloud-light texture using the buttermilk secret.
Melt the Butter and Mix Wet Ingredients
In a medium saucepan, melt the 0.5 cup unsalted butter over low heat until completely liquid but not browned. Let it cool slightly—you want it warm to the touch but not hot. In a large mixing bowl, combine the 1.5 cups buttermilk, 2 whole large eggs, 1 teaspoon vanilla extract, and the cooled melted butter.
Whisk vigorously for 2 minutes until fully blended. The buttermilk's acidity reacts with the baking powder later, creating those signature air pockets. I like to use a hand mixer here for consistency—it ensures no lumps form in the wet ingredients. This mixture should be smooth and slightly thick, almost like a thin batter.
Sift Dry Ingredients and Combine Gently
In a separate bowl, sift together the 1.5 cups all-purpose flour, 0.5 cup granulated sugar, 2 teaspoons baking powder, and 0.5 teaspoon salt. This sifting step is crucial—it aerates the dry ingredients and prevents dense pancakes. Make a well in the center of the dry mixture large enough to comfortably pour in the wet ingredients.
Gradually pour the wet mixture into the dry ingredients while gently stirring with a spatula. Mix just until combined—you should still see small flour streaks throughout. Overmixing develops gluten and makes pancakes tough. Fold in the 1 cup semi-sweet chocolate chips using a rubber spatula, ensuring even distribution. The batter should be thick but pourable, similar to heavy cream consistency.
Rest the Batter for Optimal Fluffiness
Let the batter rest for 10 minutes at room temperature. This brief rest allows the flour to fully hydrate and the baking powder to begin activating, which maximizes the rise. Don't skip this step—I've found it makes a noticeable difference in the pancakes' final height and texture. Cover the bowl loosely with plastic wrap or a damp towel to prevent a skin from forming on top.
While the batter rests, preheat your griddle or non-stick skillet over medium heat. You're aiming for a temperature where a few drops of water sizzle and evaporate immediately. This medium heat creates the perfect environment for even cooking without burning the outsides before the insides are done. The ideal griddle temperature is around 350°F—use an infrared thermometer if you're unsure.
Cook Perfectly Golden Pancakes
Ladle about ¼ cup of batter onto the preheated griddle for each pancake, using the back of the ladle to spread it into a 4-inch circle. You should hear a gentle sizzle as the batter hits the surface. Cook until bubbles form on the surface and the edges look set—this typically takes 2-3 minutes. I press down gently on the pancake during the first minute to ensure even contact with the griddle and prevent curling.
Flip carefully when you see the edges starting to lift and the top surface has lost its wet sheen. Cook for another 1-2 minutes on the second side until golden brown underneath. The pancakes are done when they're firm to the touch and have developed a beautiful golden-brown color on both sides. Keep cooked pancakes warm in a 200°F oven while you finish the batch.
Serve Immediately for Maximum Fluff
Transfer the pancakes to a serving platter and serve immediately while they're at their peak fluffiness. The buttermilk's acidity creates a tender crumb that starts to firm up as it cools. For extra indulgence, top with additional melted butter, a dusting of powdered sugar, or fresh fruit. These pancakes are best enjoyed right away—they'll still be warm, light, and packed with melty chocolate chip pockets throughout.
Real talk: if you find your pancakes aren't as fluffy as expected, it's likely one of two things—the butter wasn't melted enough (it should be liquid but not hot) or the batter was overmixed. The secret to that cloud-light texture lies in those air pockets created by the buttermilk and baking powder reaction, so handle the batter gently throughout the process.
Pro Tips For Making Fluffy Chocolate Chip Pancake
- MEASURE BUTTERMILK ACCURATELY: Use a liquid measuring cup, not the buttermilk carton—it’s thicker than water. I learned this the hard way when my pancakes turned out dense; 1 cup in a dry measuring cup is not the same as 1 cup in a wet one. Pour it in first, then add the rest of the wet ingredients to avoid lumps.
- WHISK DRY INGREDIENTS FIRST: Sift the flour, sugar, baking powder, and salt together before adding buttermilk. I used to mix them in the bowl without sifting, and my pancakes always had a weird texture. A quick whisk here ensures even distribution—no clumps, no surprises.
- LOW AND SLOW FOR FLUFF: Once bubbles form on top (about 2-3 minutes), lower the heat and cover the pan with a lid. I used to rush them, and they’d cook unevenly—crispy outside, raw inside. Let them steam gently for another 30 seconds; that’s when they get actually fluffy.
- FOLD CHOCOLATE CHIPS IN LAST: Save half the chips for topping, then gently fold the rest into the batter just before cooking. I was skeptical—doesn’t that ruin the surprise? Nope. The chips stay melty and distributed, and you still get that first bite of gooey goodness. (Yes, even if you’re impatient like me.)
Pro cooking tips for fluffy chocolate chip pancake
Buttermilk Magic
The buttermilk is the star here—its acidity reacts with baking soda to create those signature air pockets. I always use 1.5 cups of fresh buttermilk (or the homemade version with 1 tbsp lemon juice + 1.5 cups milk), never powdered.
This reaction starts immediately when mixed with dry ingredients, so work quickly after combining. The batter should look thick but pourable, like heavy cream. If it's too thin, add 1-2 tbsp more flour—this keeps the structure intact for that cloud-light texture. 🥛
Heat Control Secrets
Medium heat is your best friend—around 350°F on your griddle or skillet. Too hot, and you'll burn the outside before the inside cooks. Too cool, and you'll get gummy pancakes. I test by sprinkling a few drops of water—they should sizzle and evaporate instantly.
A non-stick skillet (like Cuisinart MultiClad) or cast iron works best. If your pancakes brown too fast, lower the heat slightly and cook them slower. 🌡️
Batter Resting Matters
Never skip the 10-minute rest—this lets the flour hydrate fully and the baking powder activate. I cover the bowl with a damp towel to prevent a skin from forming. The batter will look slightly thicker after resting, which is perfect for those tall, fluffy peaks.
Pro tip: If you're making a big batch, divide the batter into two bowls and rest them separately. This keeps the chocolate chips evenly distributed and prevents overcrowding on your griddle. ⏳
Chocolate Chip Placement
Fold in the 1 cup chocolate chips at the very end using a rubber spatula. This ensures even distribution and prevents them from sinking to the bottom. I like to use Nestlé or Ghirardelli chips because they melt beautifully without turning grainy.
For extra indulgence, sprinkle an additional ¼ cup on top of each pancake before serving—this creates pockets of melted chocolate in every bite. 🍫
Flipping Technique
Flip when you see bubbles forming on the surface and the edges look set (2-3 minutes). I press down gently with a spatula during the first minute to flatten any bubbles and ensure even cooking. Flip carefully—if the pancake isn't ready, it'll fall apart.
Cook the second side for 1-2 minutes until golden brown. If you're unsure, cut a small pancake in half to check doneness. The center should be cooked through with no raw batter remaining. 🔄
Keeping Pancakes Warm
Transfer cooked pancakes to a 200°F oven while you finish the batch. This keeps them warm and fluffy without drying out. I place them on a wire rack set over a baking sheet to allow air circulation.
If you're serving a crowd, keep them in the oven until ready to serve—this prevents them from getting soggy. For extra crispiness, pop them under the broiler for 30 seconds before serving. 🔥
Nutrition facts
Frequently asked questions
Why does this recipe use buttermilk instead of regular milk?
The buttermilk creates chemical reactions with baking powder that produce those signature air pockets for maximum fluffiness. Its acidity also adds subtle tang that balances the sweetness. The 30-minute rest lets these reactions fully develop for cloud-light results.
Can I make these pancakes without a griddle?
Use a non-stick skillet or even a well-seasoned cast iron pan. The key is maintaining medium heat (350°F) and avoiding overcrowding. Cook in batches if needed to keep the heat consistent for even cooking.
What if my pancakes turn out too dense?
Overmixing or skipping the batter rest are the most common causes. Mix just until combined (small flour streaks remain) and always let the batter rest 10 minutes. Also ensure your butter is melted but not hot when mixing. For extra fluff, add ½ teaspoon extra baking powder next time.
How do I prevent the chocolate chips from sinking?
Fold them in at the very end using a rubber spatula, ensuring even distribution. For extra staying power, chill the batter 15 minutes before cooking. You can also sprinkle additional chips on top before serving for melted pockets in every bite.
Can I make these pancakes ahead of time?
Fresh is best, but you can prepare the batter up to 24 hours ahead and refrigerate it (cover tightly). For made-ahead pancakes, cook them completely, cool, then freeze between parchment paper. Reheat in a 350°F oven for 10 minutes to restore crispiness.