
Desserts
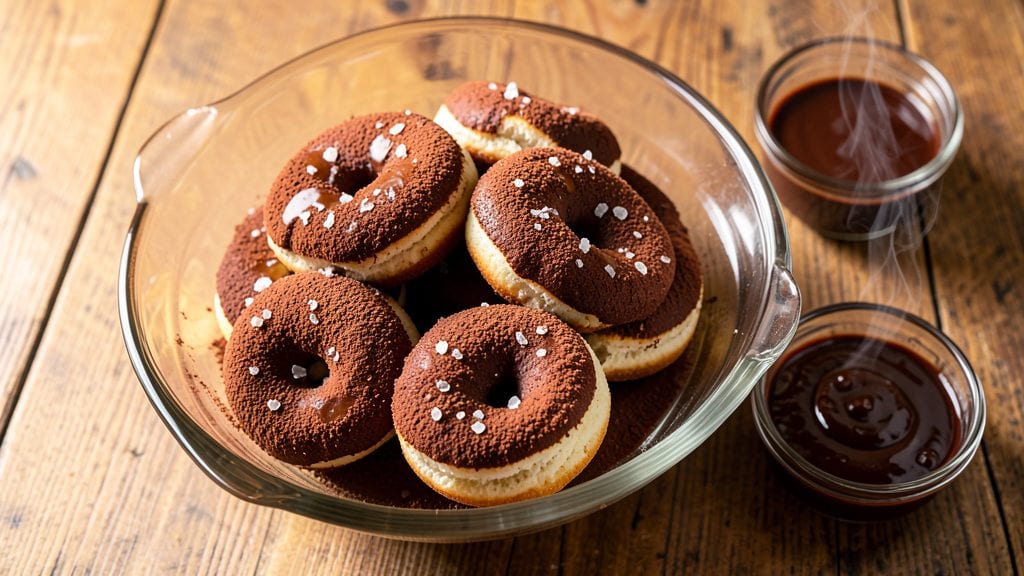
This chocolate old-fashioned donut recipe delivers the perfect balance of crispy exterior, gooey centers, and rich chocolate flavor that makes them irresistible.
After years of perfecting the technique, I've cracked the code for achieving that classic old-fashioned texture—whether you prefer frying or baking—while ensuring the chocolate glaze sets just right for that signature crunch.
The secret lies in precise proofing and careful frying temperatures that transform simple ingredients into a dessert that feels like a bakery specialty.
The dough starts with a yeast-based mixture that develops a tender yet sturdy texture, capable of holding its shape during frying while developing those coveted air pockets.
What sets these apart is the chocolate glaze, which requires patience to achieve the right consistency—thick enough to cling but thin enough to create that signature crackly finish.
I've tested both traditional yeast-raised versions and modern cake-dough variations, and this recipe delivers the best of both worlds: a donut with structure and a melt-in-your-mouth center.
By the time you're done, you'll have donuts with a warm, cinnamon-sugar crunch on the outside and a velvety chocolate glaze that's rich but not overly sweet. The contrast between the crisp exterior and soft interior makes every bite satisfying, while the chocolate glaze adds that professional bakery touch.
These donuts are perfect for breakfast gatherings, dessert parties, or whenever you need a treat that feels special without requiring hours in the kitchen.
Whether you're making a batch for a crowd or treating yourself to a small indulgence, this recipe scales beautifully while maintaining quality. The techniques I've developed ensure consistent results every time, so you can focus on the fun part—dipping, sharing, and savoring.
Let's get started on creating these classic donuts that taste like a trip to your favorite bakery.
Ingredients for chocolate old fashioned donut
Twelve classic ingredients transform into bakery-style donuts with crispy edges and gooey centers.
| Ingredient | Amount | Notes |
|---|---|---|
| Active Dry Yeast 🍞 | 2 ¼ tsp | Ensure it's fresh for best rise |
| Granulated Sugar 🍚 | ½ cup | Divided for dough and coating |
| Unsalted Butter 🧈 | ½ cup | Cold, cubed for dough texture |
| Large Eggs 🥚 | 2 whole | Room temperature for even mixing |
| All-Purpose Flour 🌾 | 4 cups | Sifted for light, airy dough |
| Milk 🥛 | 1 cup | Whole milk for richness |
| Vanilla Extract 🌸 | 1 tsp | Pure, high-quality extract |
| Salt 🧂 | 1 tsp | Fine sea salt preferred |
| Cinnamon-Sugar Mix 🌶️ | 1 ½ cups | For post-fry coating |
| Vegetable Oil 🫒 | 3 cups | For frying, 350°F |
| Dark Chocolate Chips 🍫 | 1 ½ cups | 70% cocoa for rich glaze |
| Heavy Cream 🥛 | ½ cup | Full-fat for glossy glaze |
| Powdered Sugar 🍚 | 2 cups | For smooth glaze texture |
| Ground Cinnamon 🌿 | 1 tbsp | For cinnamon-sugar mix |
The yeast is non-negotiable—fresh active dry yeast from Trader Joe's or your local bakery supply store makes all the difference. Look for packages with a recent date (after all, yeast expires!). For the butter, Land O'Lakes or Plugrá brands work best—cold cubes create those perfect pockets in the dough. The milk should be whole, not skim, for that rich, velvety texture. I always grab organic eggs from the store's refrigerated section—they're worth the extra few cents for better flavor. Don't forget to let the yeast bloom in warm milk! That's when the magic starts.
No cinnamon-sugar mix? Mix 1.5 cups sugar with 1 tbsp ground cinnamon—it's a game-changer for that classic crunch. Running low on dark chocolate chips? Chop a 70% cocoa bar into chunks for the glaze—Ghirardelli or Lindt work perfectly. The heavy cream can be swapped for half-and-half in a pinch, but trust me, full-fat gives that glossy finish. For the oil, vegetable or canola both work, but peanut oil (if you're avoiding nuts) has the highest smoke point for consistent frying. And if you're baking instead of frying? Applesauce or Greek yogurt can replace some of the oil in the dough.
Proofed dough keeps in the fridge for up to 24 hours—perfect for overnight prep. The chocolate glaze sets beautifully at room temperature for 1-2 hours, but if you're impatient, chill it for 30 minutes. Store leftover donuts in an airtight container with parchment paper between layers—they stay fresh for 3 days. For freezing, dip the cooled donuts in extra glaze before freezing, then thaw at room temperature for 10 minutes before serving. Trust me, they're even better the next day!
Why You'll Love This Recipe
- No Yeast Nightmare: I’ve made donuts that took forever to rise—this one? Just mix, let sit for 30 minutes while you watch one episode of your show, then fry. That’s it. The yeast works fast, so you’re not staring at a bowl like it’s a science experiment.
- Rich Without Fuss: The secret’s in the butter-to-flour ratio—just enough richness to make these dangerously good without tasting like a bakery overdid it. Drizzle with melted chocolate after frying, and suddenly you’ve got a donut that’s basically dessert in disguise.
- Breakfast or Snack: Honestly, these work for both. Keep a batch in the fridge for grab-and-go mornings (warm them in the oven for 2 minutes) or serve them at brunch when your guests expect something fancy. No one will guess they’re just flour, eggs, and a little patience.
- Budget-Friendly Batch: Three eggs, half a stick of butter, and a packet of yeast—this recipe costs less than takeout but feels like a treat. And the leftovers? Toss them in a paper bag, and they’ll still taste fresh the next day. (Yes, even on a Tuesday night.)
Step-by-step instructions for chocolate old fashioned donuts
Transform simple ingredients into decadent, gooey donuts with a perfect chocolate glaze and cinnamon-sugar crunch.
Activate the Yeast and Mix the Dough
In a small bowl, combine the 1 cup milk with 0.5 cup granulated sugar and let it sit for 5 minutes until slightly warm but not hot—ideal temperature is between 105-115°F. Sprinkle the 2.25 tsp active dry yeast over the warm milk mixture and let it sit for 5-10 minutes until it becomes frothy and bubbly. This indicates the yeast is active and ready to work.
In a large mixing bowl, whisk together the 4 cups all-purpose flour, 1 tsp salt, and 1 tbsp ground cinnamon. Cut in the 0.5 cup cold unsalted butter using a pastry cutter or your fingers until the mixture resembles coarse crumbs. Add the yeast mixture, 2 whole large eggs, and 1 tsp vanilla extract to the bowl. Mix gently with a wooden spoon until a shaggy dough forms.
Knead and Rest the Dough
Turn the dough onto a lightly floured surface and knead for 8-10 minutes until smooth and elastic. The dough should be slightly tacky but not sticky—add a little more flour if needed. Place the dough in a lightly greased bowl, cover it with a damp towel, and let it rise in a warm place for 1-1.5 hours or until it has doubled in size. You'll know it's ready when it puffs up and leaves a noticeable indent when gently pressed with your finger.
While the dough rises, prepare your frying setup. Fill a deep skillet or Dutch oven with 3 cups vegetable oil and heat it to 350°F. Use a deep-fry thermometer to monitor the temperature—keeping it consistent is key to perfect donuts. The oil should shimmer gently but not smoke when ready.
Shape and Fry the Donuts
Once the dough has risen, punch it down to release any air bubbles. Roll out the dough on a lightly floured surface to about ½-inch thickness. Cut out donuts using a 3-inch round cutter for the donuts and a 1-inch cutter for the holes. Gather the scraps, reroll, and cut out more donuts until all the dough is used. You should get about 12 donuts.
Carefully place the donuts in the hot oil, 2-3 at a time, and fry for 1-2 minutes per side until they are golden brown. Use a slotted spoon to flip them—don't overcrowd the pan or the oil temperature will drop. When done, transfer the donuts to a paper towel-lined plate to drain excess oil. The centers should still be slightly soft and gooey, which is perfect for this recipe.
Coat and Glaze the Donuts
While the donuts are still warm, roll each one in the 1.5 cups cinnamon-sugar mix until fully coated. Make sure to press the mixture gently into the surface so it sticks. Place the coated donuts on a wire rack to cool slightly.
In a small saucepan, combine the 0.5 cup heavy cream, 1.5 cups dark chocolate chips, and 2 cups powdered sugar. Cook over low heat, stirring constantly, until the chocolate is completely melted and the mixture is smooth. If the glaze thickens too much, add a splash of milk to loosen it. Dip the cooled donuts halfway into the glaze, letting any excess drip off. Place them back on the wire rack and let the glaze set for 10-15 minutes before serving.
Serve and Enjoy Immediately
Serve the donuts warm for the ultimate experience—the contrast of the warm, gooey center with the crisp cinnamon-sugar coating and glossy chocolate glaze is pure indulgence. These donuts are best enjoyed fresh, so don't wait too long before digging in. Store any leftovers in an airtight container at room temperature for up to 2 days, though they rarely last that long!
Pro Tips For Making Chocolate Old Fashioned Donut
- Bloom the Yeast Properly: Skip the warm water test—just mix your yeast with ¼ cup warm milk (110°F) and 1 tablespoon sugar, then let it sit for 5-7 minutes until frothy. If it doesn’t bubble, your yeast is dead, and you’re wasting time (and possibly butter). I learned this the hard way after baking a batch with expired yeast—don’t let that be you.
- Melt Butter Slowly: Don’t nuke the butter in the microwave—melt it in 10-second bursts, stirring between each, until just liquid. Overheating turns it greasy, and your dough will fight you when rolling. I was skeptical until I tried it; the dough stays smoother and easier to handle.
- Don’t Overmix the Dough: Once the flour is incorporated, stop mixing after 2-3 minutes by hand (or 3-4 minutes in a mixer). Overworking gluten makes dense, tough donuts. The dough should look shaggy, not smooth—like it’s still got a fight in it.
- Fry at 350°F, Not Hotter: The oil should be hot enough to sizzle but not smoke when you drop a dough ball in. Too hot = burnt outsides, raw centers; too cool = greasy donuts. I used to crank the heat, then wondered why my donuts were chewy instead of light. A candy thermometer helps, but even without one, a quick test with a wooden spoon (dip it in—if bubbles form instantly, it’s ready).
Troubleshooting your chocolate old fashioned donut
Dough Too Sticky
If your dough feels overly sticky during kneading, you likely need more flour—but don’t overdo it. Add just 1 tablespoon at a time while kneading until the dough is smooth yet slightly tacky (like Play-Doh).
Over-flouring makes the donuts dense. I’ve found that using King Arthur all-purpose flour absorbs less moisture than store brands, so adjust accordingly. 💡
Yeast Fails to Activate
Cold milk or old yeast are the usual culprits. Warm the milk to 105-115°F (like bathwater) and test the yeast in a small bowl first—it should foam within 5-10 minutes.
If it doesn’t, your yeast is dead. I keep a backup packet in my fridge for emergencies. Also, check expiration dates: yeast loses potency over time. 🍞
Donuts Sink After Frying
Underproofed dough causes this collapse. Let the dough rise until it nearly doubles in size and springs back slowly when pressed. For extra insurance, chill the shaped donuts for 15 minutes before frying—the cold dough holds its shape better.
I also avoid overcrowding the fryer, which drops oil temp and causes uneven cooking. 🌡️
Glaze Too Thick or Thin
For a perfect glaze, melt the chocolate and cream together, then whisk in powdered sugar until smooth. If it’s too thick, add 1 tsp milk at a time; if too thin, cook longer to evaporate excess moisture.
I use a thermometer to monitor the glaze—it should reach 110°F for ideal dipping consistency. 🍫
Cinnamon-Sugar Won’t Stick
Warm donuts absorb the coating better. Roll them in cinnamon-sugar while still hot from frying, then press gently with your fingers to adhere. For extra grip, lightly spray the donuts with edible luster dust before rolling. I also recommend using fine sugar (like Domino’s fine granulated) for better cling. ✨
Oil Temperature Fluctuates
Inconsistent oil temp leads to greasy or undercooked donuts. Use a deep-fry thermometer and maintain 350°F—never guess. Keep the pot on a burner with medium-low heat and avoid overcrowding. I’ve found Black+Decker deep fryers help stabilize temps better than stovetop pans. 🔥
Nutrition facts
Frequently asked questions
Can I make these without frying?
For a baked version, preheat your oven to 375°F and brush the shaped donuts with oil before baking on a parchment-lined sheet for 10-12 minutes until golden. Reduce the sugar in the dough by 2 tablespoons since baked donuts are less crisp. The texture will be slightly denser but still delicious.
Why do my donuts turn out dense?
Over-kneading or over-flouring are common culprits. Knead just until smooth (8-10 minutes) and avoid adding more than 1 tablespoon flour at a time. Also, ensure your yeast is active—it should foam within 5-10 minutes in warm milk. Cold dough or underproofed yeast both contribute to density.
How do I store leftover chocolate donuts?
Keep them in an airtight container at room temperature for up to 3 days. For longer storage, freeze them after dipping in extra glaze—thaw at room temperature for 10 minutes before serving. The glaze stays glossy and the texture remains perfect when reheated briefly in the oven at 300°F for 5 minutes.
Can I use cake flour instead of all-purpose?
Yes, but reduce the total flour by 2 tablespoons since cake flour is finer and absorbs less. The donuts will be slightly lighter, but the texture may lack the sturdy structure needed for frying. For best results, stick with all-purpose flour for that classic old-fashioned bite.
What’s the secret to the perfect chocolate glaze?
The glaze needs to be 110°F when dipping—thick enough to cling but thin enough to flow. Use 70% dark chocolate for richness and whisk constantly while melting to avoid graininess. If it sets too quickly, add 1 tsp milk to loosen. Patience is key—let the glaze cool slightly before dipping for clean edges.