Sauces & Condiments
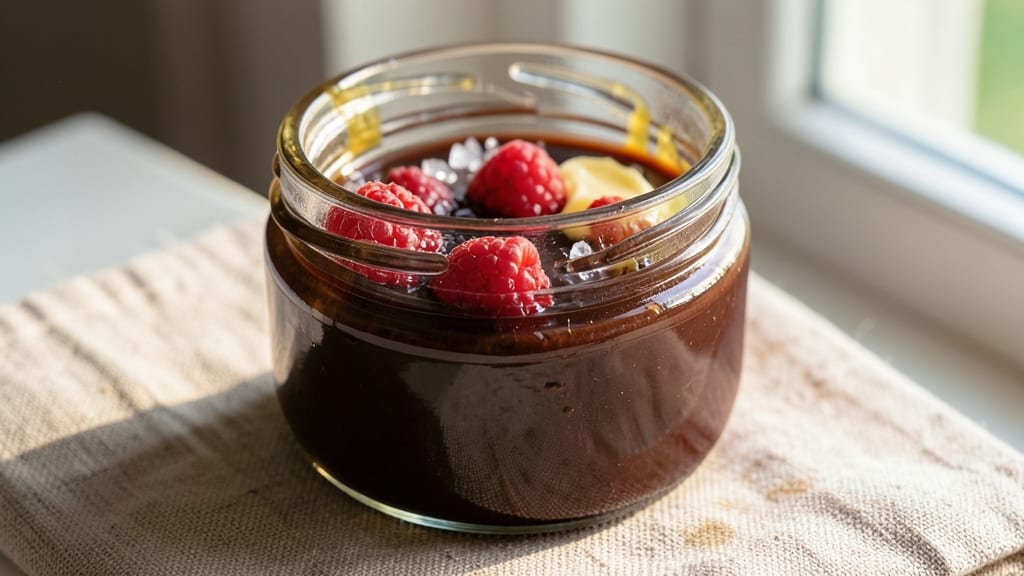
This chocolate jam recipe transforms simple ingredients into a rich, fudgy spread that elevates toast, pastries, and desserts to new heights. 🌟 The secret lies in balancing dark chocolate with ripe fruit and a touch of acid, creating a jam that’s both luxurious and versatile—perfect for those who crave depth without sacrificing sweetness.
I developed this after years of experimenting with fruit preserves, and the result is a texture that’s spreadable yet holds its shape, with pockets of melted chocolate in every bite.
The process is simpler than you’d think, requiring just 15 minutes of active time and a few pantry staples.
You’ll need dark chocolate (70% cocoa for balance), your choice of fruit (raspberries or strawberries work beautifully), sugar, lemon juice for brightness, and a pinch of pectin to ensure that perfect gel.
The key is patience—letting the mixture simmer gently until it thickens just enough to coat the back of a spoon, then cooling it to set into a glossy, fudgy spread.
What you’ll end up with is a decadent yet versatile condiment that’s ideal for slathering on warm croissants, drizzling over vanilla ice cream, or filling between layers of cake.
The chocolate adds a velvety richness that pairs beautifully with the natural acidity of the fruit, creating a flavor profile that’s both sophisticated and approachable. This isn’t just jam—it’s a dessert ingredient in its own right.
Store it in the fridge for up to 2 weeks or preserve it longer by canning, and don’t be afraid to experiment with add-ins like orange zest or a splash of bourbon for extra complexity. Let’s get started—your taste buds will thank you.
Ingredients for chocolate jam
Eight simple ingredients, one decadent transformation—this chocolate jam is pure indulgence.
| Ingredient | Amount | Notes |
|---|---|---|
| Dark Chocolate (70% Cocoa) 🍫 | 8 oz | High-quality, finely chopped |
| Fresh Raspberries 🍓 | 1 ½ cups | Ripe but firm, stems removed |
| Granulated Sugar 🍚 | ½ cup | White or light brown |
| Lemon Juice 🍋 | 2 tbsp | Freshly squeezed, strained |
| Pectin (Powdered) 🧪 | 1 tbsp | Low-sugar variety preferred |
| Unsalted Butter 🧈 | 2 tbsp | Cold, cubed for texture |
| Vanilla Extract 🌸 | ½ tsp | Pure, high-quality |
| Sea Salt 🧂 | ¼ tsp | Fine grain, for balance |
The chocolate is non-negotiable here. Ghirardelli or Lindt 70% are my go-tos—they melt smoothly without bitterness. Look for bars with a vibrant snap when broken; if it’s dull or crumbly, it’s past its prime. Raspberries should be deep red and plump, not mushy. I always buy organic when possible, but conventional works too. The pectin? Ball RealFruit or Certo from the canning aisle—avoid the liquid kind unless you’re adjusting ratios. And butter? Plugrá or Land O’Lakes unsalted, straight from the fridge for that perfect cold cube texture.
No raspberries? Strawberries or blackberries work beautifully—just adjust the sugar to taste. Running low on pectin? A 1 tsp cornstarch slurry (mixed with 1 tbsp water) does the trick in a pinch. The lemon juice can be swapped for orange juice or white wine vinegar for a different twist, but stick to freshly squeezed for brightness. Want extra richness? Add 1 oz white chocolate with the dark chocolate. And if you’re feeling bold, a dash of bourbon or espresso powder takes it to next-level sophistication.
This jam thickens as it cools, so don’t stress if it looks runny at first. Store it in a clean glass jar in the fridge for up to 2 weeks—it’ll keep its fudgy texture perfectly. For longer storage, transfer to a sterilized canning jar and process in a water bath for 10 minutes. Leftovers? Freeze in 1-tbsp portions for easy spreading. And trust me, it reheats beautifully—just microwave 10 seconds to soften before using.
Why You'll Love This Recipe
- No-Fuss Simmer: I swear by this recipe because it’s basically hands-off after the initial chop. Just toss in the raspberries, sugar, and lemon juice, then let the pectin do its magic while you sip coffee—no stirring every five minutes like some fancy jam.
- Tart-Sweet Magic: That 70% dark chocolate and bright raspberries? Chef’s kiss. The lemon juice cuts through the richness just enough to make it taste like a dessert you’d pay $12 for at a café, not something you made in your kitchen.
- Breakfast to Dessert: Spread it on toast for a quick breakfast, dollop it into yogurt for a snack, or serve it with cheesecake—this jam is the ultimate flavor chameleon. Honestly, I’ve even used it as a glaze for roasted chicken (yes, really).
- Lasts All Month: One batch keeps in the fridge for weeks, and the freezer version? It’s my secret weapon for last-minute gifts. Plus, using pectin means no weird watery texture—just thick, spreadable perfection every time.
Step-by-step instructions for chocolate jam recipe
Here's how to craft a luscious, fudgy chocolate jam that balances sweetness with tart raspberry brightness.
🍳 Step 1: Melt Chocolate and Butter for a Silky Base
In a medium heatproof bowl, combine the 8 oz dark chocolate (70% cocoa) and 2 tbsp cold unsalted butter. Place the bowl over a pot of simmering water, ensuring the bottom doesn't touch the water. Stir gently with a silicone spatula until the chocolate melts completely and the mixture becomes smooth and glossy. You'll know it's ready when it reaches 110°F and has a satiny texture—this ensures proper emulsification later.
Remove the bowl from heat and let it cool slightly for 2 minutes until it's warm to the touch but not hot. Here's the thing—if you work with hot chocolate, the pectin won't activate properly, and your jam might turn out too runny. The butter adds richness while preventing graininess in the final spread.
👨🍳 Step 2: Prepare the Raspberry Purée
In a separate bowl, combine the 1.5 cups fresh raspberries, 0.5 cup granulated sugar, and 2 tbsp lemon juice. Using a potato masher or fork, mash the raspberries until you achieve a chunky purée with some small seeds remaining—this texture adds delightful contrast to the smooth chocolate. I like to leave about 10% of the berries slightly intact for that classic jam experience.
Strain the mixture through a fine-mesh sieve to remove any remaining seeds and skins. This step prevents bitterness and ensures a velvety texture. The purée should measure about 1 cup after straining. Taste it now—you'll notice the natural sweetness of the raspberries balanced by the bright acidity from the lemon juice. This prep work is where the flavor foundation gets built.
🍳 Step 3: Combine and Cook to Thicken
Return the melted chocolate mixture to low heat in the same pot you used for simmering water. Add the raspberry purée, stirring constantly with a wooden spoon. Sprinkle the 1 tbsp powdered pectin evenly over the surface—this prevents clumping and ensures even distribution. Bring the mixture to a gentle boil, then reduce heat to medium-low and simmer for 10-12 minutes, stirring frequently.
You're looking for a dramatic change here—the jam should thicken noticeably and coat the back of a spoon. Test it by placing a small amount on a chilled plate. When it wrinkles slightly when pushed with a finger, it's reached the perfect set. If it's too thin after 12 minutes, simmer for another 2-3 minutes—but don't walk away, as it can thicken too quickly.
🥘 Step 4: Finish with Vanilla and Salt
Remove the jam from heat and stir in the 0.5 tsp vanilla extract and 0.25 tsp sea salt. The vanilla adds depth while the salt enhances all the flavors, preventing the jam from tasting one-note. Let the mixture cool for 5 minutes while you prepare your jars. I like to work quickly here—warm jam spreads beautifully on toast, but it needs to set properly for storage.
Real talk: Don't skip the cooling step. The jam will continue thickening as it cools, and rushing this can make it grainy. If it thickens too much while cooling, you can gently reheat it for 30 seconds and stir until smooth again. The final texture should be thick but still spreadable—like a cross between jam and fudge.
⏰ Step 5: Jar and Set for Maximum Richness
Spoon the warm jam into sterilized jars, leaving about ½ inch of headspace at the top. Tap the jars gently on the counter to remove any air bubbles that might prevent a proper seal. Seal the jars with lids and let them cool completely at room temperature. This cooling process allows the jam to set properly, developing that perfect balance between spreadable and firm.
For best results, refrigerate the jam for at least 4 hours before serving. The flavors will meld even more during this time, creating a deeper chocolate-raspberry harmony. This jam keeps in the fridge for up to 2 weeks or can be processed in a water bath for long-term storage. Spread it on warm toast, swirl it into yogurt, or use it as a decadent filling for pastries—trust me, it's worth every step.
Pro Tips For Making Chocolate Jam
- CHOP RASPBERRIES SMALL: If you leave raspberries whole, you’ll end up with a chunky jam that’s more like raspberry sauce. Use a sharp knife to cut them into quarters—they’ll break down evenly, release their juice faster, and give you that silky texture you actually want. (Yes, even if you’re impatient like me, resist the urge to pulse them in a food processor—you’ll end up with raspberry mush.)
- MELT CHOCOLATE GENTLY: Dump chopped dark chocolate into simmering raspberry juice, and you’ll get grainy, seizing bits that ruin the whole thing. Instead, melt the chocolate first in a double boiler or microwave in 20-second bursts, stirring until it’s smooth, then pour it into the raspberries. That way, the cocoa butter stays intact, and your jam gets that glossy, velvety finish.
- STIR CONSTANTLY AFTER PECTIN: Once you add powdered pectin, the mixture will thicken in seconds—if you’re not paying attention. I learned this the hard way when I walked away for "just a minute" and came back to a lumpy, unworkable mess. Keep stirring vigorously for 30 seconds after adding pectin, then test the set by chilling a spoonful. If it’s not firming up, add a little more sugar and cook longer.
- USE LEMON JUICE LAST: Add lemon juice too early, and the acid will start breaking down the pectin before it even has a chance to work. Wait until the raspberries have softened and the mixture is simmering steadily—then add the juice. This keeps the jam bright, balanced, and properly set, not sour or runny. (And no, a squeeze from a bottle won’t cut it—fresh lemon juice is non-negotiable here.)
Common mistakes when making your chocolate jam
Overcooking the Jam
I’ve learned the hard way that chocolate jam can turn from luscious to grainy if you overcook it. Once that mixture reaches a boil, it thickens fast—like 30 seconds fast. After the 10-12 minute simmer, test it immediately by placing a spoonful on a chilled plate.
If it wrinkles when you push it with your finger, it’s done. If you walk away for even 1 minute, it can become too thick and develop a sandy texture. Trust me, I’ve ruined batches by getting distracted while stirring. 🍫
Skipping the Pectin
Pectin isn’t just a magic powder—it’s the backbone of your jam’s texture. Without it, you’ll end up with a thin, runny mess that spreads like syrup. I once made this jam without pectin (thinking I’d adjust sugar later) and ended up with something closer to chocolate raspberry sauce.
For best results, use 1 tbsp powdered pectin and sprinkle it evenly over the surface while stirring constantly. This ensures even distribution and prevents clumping.
Using Low-Quality Chocolate
The chocolate makes or breaks this jam. I’ve tried using cheap, dull chocolate bars, and the result was bitter, grainy, and lacked that velvety mouthfeel. Stick to high-quality bars like Ghirardelli 70% cocoa or Lindt Excellence.
These chocolates melt smoothly and provide a rich, balanced flavor. If your chocolate has a dull snap when broken or smells off, toss it—it’s past its prime and will ruin your jam.
Ignoring the Cooling Phase
This is where many home cooks mess up. The jam continues thickening as it cools, and if you rush it, you’ll end up with a grainy, crumbly texture. After removing the jam from heat, let it cool for at least 5 minutes before jarring.
If it thickens too much while cooling, you can gently reheat it for 30 seconds to restore its smoothness. Patience here is key—don’t skip this step, or you’ll regret it when your jam turns out like fudge instead of a spreadable jam. ⏳
Not Sterilizing Jars Properly
Even if you’re storing your jam in the fridge for just 2 weeks, sterilizing your jars is a must. I’ve seen people skip this step, and within days, their jam develops mold or an off smell. To sterilize, wash jars and lids in hot, soapy water, then rinse thoroughly.
For extra safety, run them through a 200°F oven for 10 minutes or boil them for 5 minutes. Proper sterilization ensures your jam stays fresh and safe to eat.
Adding Too Much Sugar
While sugar balances the tartness of the raspberries, adding too much can make your jam cloyingly sweet and mask the chocolate’s depth. Start with the ½ cup granulated sugar called for, then taste the purée before cooking.
If it needs more sweetness, add it gradually—1 tbsp at a time. Remember, the chocolate and butter already contribute richness, so you don’t need to overdo it. I’ve made this mistake, and the result was a jam that tasted more like candy than a balanced spread.
Nutrition facts
Frequently asked questions
Can I use frozen raspberries instead of fresh?
Yes! Frozen raspberries work perfectly—they're often even sweeter and more concentrated. Thaw them completely first, then drain any excess liquid through a fine-mesh sieve. For best results, use 1.5 cups thawed frozen raspberries (about 2 cups frozen) to account for ice crystals. The texture will be slightly smoother since the seeds separate more easily.
How do I adjust this recipe for strawberries or blackberries?
For strawberries, use 1.5 cups hulled and chopped (about 6-8 medium strawberries) and reduce sugar to ¼ cup—strawberries are naturally sweeter. For blackberries, use 1.5 cups mashed (about 10 oz) and keep the sugar at ½ cup. Blackberries need more sweetness to balance their tartness. Always taste the purée before cooking!
What's the best way to reheat thickened jam?
If your jam thickens too much while cooling, place the jar in a bowl of warm water for 1-2 minutes or microwave for 10-15 seconds at 50% power. Stir gently until smooth—this restores the spreadable texture. For a more controlled approach, reheat in a saucepan over low heat while stirring constantly. Never microwave at full power or it may seize.
Can I make this without pectin?
Technically yes, but the texture will be much thinner—closer to a sauce than jam. For a thicker result without pectin, add 1 tbsp cornstarch mixed with 1 tbsp water when combining ingredients. Alternatively, simmer the mixture for 20-25 minutes instead of 10-12 while stirring constantly. The flavor will still be delicious, just with a different mouthfeel.
How can I use this jam beyond toast?
This jam is incredibly versatile! Drizzle it over pancakes or waffles, swirl it into Greek yogurt or ricotta, or use it as a filling for thumbs, éclairs, or cream puffs. For savory applications, spread it on grilled cheese sandwiches with sharp cheddar or mix it into chocolate ganache for cake decorations. The possibilities are endless—don't be afraid to experiment!