
Desserts
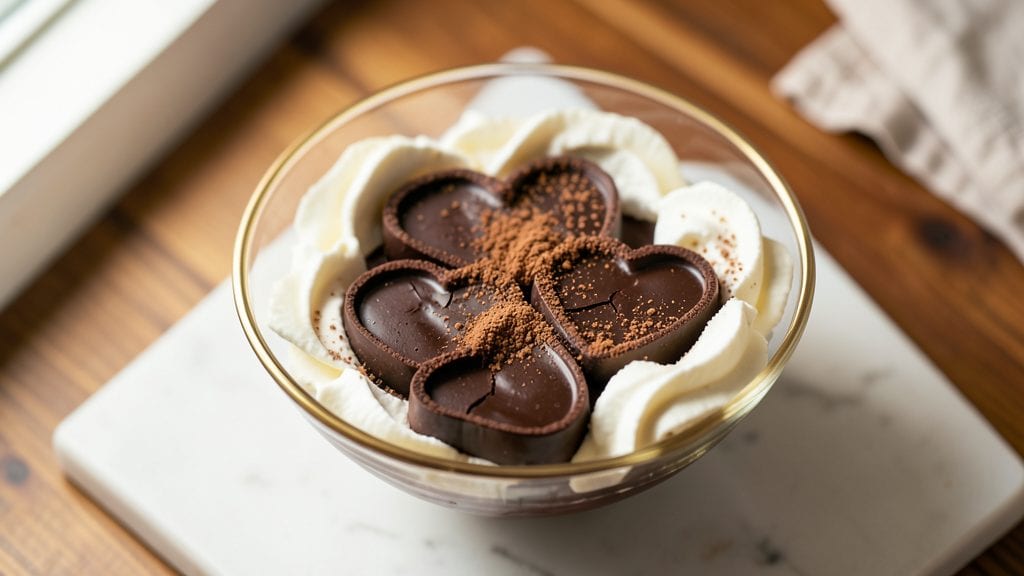
This chocolate hearts recipe transforms Valentine’s Day into a hands-on celebration with silky ganache and a toasted cocoa crunch that melts in your mouth. The secret lies in tempering the chocolate just right to create a glossy, crack-free finish while keeping the centers rich and velvety.
I developed this technique after years of experimenting with confectionery textures, and it never fails to impress—whether you're gifting them or savoring them yourself.
The process is simpler than it sounds: melt high-quality chocolate with a touch of cream for that signature ganache, then shape it into delicate hearts using silicone molds or stencils. A sprinkle of toasted cocoa powder adds that professional crunch without overpowering the chocolate's depth.
What you'll end up with are bite-sized edible treasures that look as stunning as they taste—perfect for decorating tables, filling gift boxes, or simply enjoying as a sweet treat.
These chocolate hearts aren't just for Valentine's Day; they're versatile enough for birthdays, anniversaries, or even as a whimsical dessert any time of year. The recipe scales easily, so you can make just a few for a romantic dinner or a large batch for a party.
With proper storage, they stay fresh for up to a week, though I can't guarantee they'll last that long once you start sharing.
Ready to elevate your confectionery game? The key is patience—letting the chocolate set at room temperature ensures a clean break when unmolding. Whether you stick to classic chocolate or experiment with flavors like raspberry ganache or orange zest, the technique remains the same.
Let's get started on creating these edible works of art.
Ingredients for chocolate hearts
Eight ingredients transform into elegant Valentine’s Day treats with silky ganache and a toasted cocoa crunch.
| Ingredient | Amount | Notes |
|---|---|---|
| High-Quality Dark Chocolate 🍫 | 8 oz | 70% cocoa minimum, chopped |
| Heavy Whipping Cream 🥛 | ½ cup | Full-fat for silky texture |
| Unsalted Butter 🧈 | 2 tbsp | For extra richness |
| Toasted Cocoa Powder 🍫 | 2 tbsp | Natural, unsweetened |
| Vanilla Extract 🌿 | ½ tsp | Pure, high-quality |
| Granulated Sugar 🍚 | 1 tbsp | For balancing bitterness |
| Silicone Heart Molds 💖 | 1 set | 4-6 cavity size |
| Parchment Paper 📄 | 1 sheet | For easy unmolding |
| Fine Sea Salt 🧂 | ¼ tsp | For finishing touch |
The chocolate is non-negotiable here—Valrhona or Guittard are my go-tos, but any high-quality 70% cocoa or higher works. Chop it yourself for even melting (a chef’s knife works best). The heavy whipping cream should be cold straight from the fridge—room temperature cream can cause the ganache to seize. For the cocoa powder, toast it in a dry pan for 2-3 minutes until fragrant (that’s what gives the crunch). Trader Joe’s and Whole Foods carry excellent options for all these ingredients, but check the cocoa percentage on chocolate bars—it’s usually on the back.
No silicone molds? Heart-shaped cookie cutters work in a pinch—just line a baking sheet with parchment. Running short on cocoa powder? Dutch-processed cocoa at half the amount gives a similar depth. The vanilla extract can be swapped for 1/4 tsp vanilla bean paste if you’re feeling fancy. For a richer ganache, add 1 extra tbsp of butter—it’s worth the extra minute to melt it gently. And if you’re making these for a crowd, double the recipe but keep the molds separate so they set evenly. The parchment paper? Use the unbleached kind—it won’t leave a taste.
Ganache sets best at room temperature for 2-3 hours, but if you’re in a hurry, pop the molds in the fridge for 30 minutes. Store finished hearts in an airtight container with parchment between layers—they’ll stay fresh for 5-7 days at room temperature. For gifting, wrap individual hearts in cellophane bags with a ribbon. Freezing isn’t recommended—they’ll sweat and lose their crisp edges. And trust me, the first batch will disappear faster than you can say ‘Valentine’s Day.’
Why You'll Love This Recipe
- No-Fuss Whip-Up: I melt chocolate and cream, stir in butter—done. No fancy tools, no waiting forever. That toasted cocoa powder? Just a quick toaster toss while the pot heats.
- Rich Without Guilt: The dark chocolate’s deep bitterness balances the velvety cream, but the vanilla extract? It turns it from "dessert" to "I’d eat this for breakfast." Honestly, I’ve seen people skip the sugar entirely.
- Gift-Worthy in Minutes: Wrap them in parchment, tie with twine—boom, instant hostess gift. Or stash in the freezer for last-minute Valentine’s Day treats. (Yes, even when you forget to order chocolates ahead.)
- Pantry Magic: Uses ingredients you already own—no specialty lists. The leftover chocolate? Perfect for melting into coffee or spreading on toast. And a batch keeps for weeks if you’re not strong enough to resist.
Step-by-step instructions for chocolate hearts recipe
Here's how to craft velvety ganache hearts with a toasted cocoa crunch—every bite delivers perfect balance.
Melt Chocolate and Cream for Silky Ganache
In a medium heatproof bowl, combine the 8 oz high-quality dark chocolate and 0.5 cup heavy whipping cream. Place this over a saucepan of simmering water, ensuring the bottom of the bowl never touches the water. Stir gently with a silicone spatula until the chocolate melts completely and the mixture becomes glossy and smooth—this should take about 5 minutes. Remove from heat immediately once fully melted, as even slight overheating can cause the ganache to seize.
Here's the thing—you want the mixture to reach 110°F maximum. If it gets too hot, whisk in 1 teaspoon cold heavy whipping cream to bring it back down. The ganache should coat the back of a spoon with a satiny sheen, not appear grainy or streaky. Let it cool slightly for 2 minutes before proceeding—this prevents condensation when you add the butter.
Incorporate Butter and Toasted Cocoa
Add the 2 tablespoons unsalted butter and 2 tablespoons toasted cocoa powder to the melted chocolate mixture. Whisk vigorously until fully combined and the ganache reaches a thick, pudding-like consistency. You'll know it's ready when it holds its shape when drizzled from a spoon—it should form soft peaks that dissolve immediately when touched.
This is where the magic happens: the toasted cocoa powder adds that delicate crunch while balancing the richness. If the mixture looks too thick, gently warm it for 10 seconds in the microwave (stirring halfway) to restore smoothness. The ganache should be fluid enough to pour but thick enough to hold its shape in the molds.
Prepare the Molds and Pour Ganache
Line the silicone heart molds with the parchment paper, pressing it firmly into each cavity to create a smooth base. This prevents the ganache from sticking and makes unmolding effortless. Working quickly, pour the ganache into each heart mold, filling them ¾ full. Tap the molds gently on the counter to release any air bubbles trapped in the ganache—this ensures clean edges and prevents hollow centers.
Place the filled molds in the refrigerator and let the ganache set for 15 minutes. You'll know it's ready when the surface develops a firm skin that doesn't wobble when the mold is tilted slightly. Don't rush this step—proper chilling prevents the hearts from melting when you handle them later.
Finish with Vanilla and Sugar
Once the ganache is set, remove the hearts from the molds and place them on a fresh sheet of parchment paper. In a small bowl, whisk together the 0.5 teaspoon vanilla extract, 1 tablespoon granulated sugar, and 0.25 teaspoon fine sea salt. This mixture creates a delicate glaze that enhances the chocolate's depth while balancing its bitterness.
Using a pastry brush, lightly coat each heart with the vanilla-sugar mixture. The sugar will dissolve slightly, creating a subtle crystalline texture that contrasts beautifully with the smooth ganache. Let the hearts sit at room temperature for 10 minutes to allow the glaze to set completely before serving or storing.
Serve with Confidence
These chocolate hearts are best enjoyed at room temperature, where their texture reaches peak perfection. The exterior should have a velvety sheen with just a hint of crunch from the toasted cocoa, while the interior remains silky and rich. For an extra-special presentation, dust the finished hearts with an additional 0.5 teaspoon toasted cocoa powder just before serving.
Store any leftovers in an airtight container at room temperature for up to 3 days, or refrigerate for up to 1 week. To refresh, let them sit at room temperature for 10 minutes before serving—they'll regain their perfect texture every time.
Pro Tips For Making Chocolate Hearts
- Temper the Chocolate: Melt your dark chocolate slowly over a double boiler—never direct heat—until it hits 110°F (43°C) max. I learned this the hard way when I rushed it and ended up with grainy, seizing chocolate that ruined the whole batch. Patience here guarantees smooth, glossy hearts every time.
- Whip Cream to Stiff Peaks: Use a chilled mixing bowl and beat the heavy whipping cream until it forms stiff peaks that hold their shape when you lift the whisk. If it’s warm or underwhipped, your hearts will spread like sad puddles instead of holding their shape. Trust me, this is the thing that matters most.
- Toast the Cocoa Powder: Dry-toast your cocoa powder in a 350°F (175°C) oven for 5–7 minutes before mixing it in—it deepens the flavor and cuts the bitterness. Skip this, and your hearts will taste flat, like they’re missing something. (Yes, even if you’re impatient like me.)
- Chill the Mold: Pop your heart-shaped molds in the freezer for 10 minutes before filling them with the ganache. The cold surface helps the chocolate set faster and keeps the edges crisp instead of sticky. I was skeptical until I tried it—now I never skip this step.
Pro cooking tips for perfect results
Temperature Control
Chocolate is temperamental—literally! Maintain the ganache at 110°F maximum to prevent seizing or graininess. I use a candy thermometer for precision, but if you don’t have one, test the temp by dripping a tiny amount onto parchment: it should spread smoothly without streaking.
Overheating is the #1 mistake—if your chocolate looks dull or clumps, whisk in 1 tsp cold cream to cool it down. 🌡️
Mold Prep Matters
Silicone molds are a game-changer, but parchment paper is non-negotiable for clean unmolding. Press it firmly into each cavity to eliminate gaps—this prevents ganache from sticking to the sides.
Pro tip: Chill your molds in the freezer for 5 minutes before pouring to speed up setting time, especially in warm kitchens. I’ve ruined batches by skipping this step!
Toasted Cocoa Trick
Toast your cocoa powder in a dry skillet over medium-low heat for 2-3 minutes until fragrant—this adds depth and crunch. Let it cool completely before mixing into the ganache, or it’ll release moisture and weaken the texture.
For extra flair, sift the toasted cocoa over finished hearts using a fine-mesh sieve for an even dusting. 💫
Vanilla-Sugar Glaze
The vanilla-sugar mixture isn’t just for flavor—it creates a crystalline contrast against the smooth ganache. Whisk it vigorously until the sugar dissolves slightly, then brush lightly over the hearts.
Too much glaze makes them sticky; too little leaves them flat. I use a small pastry brush for precision, applying just enough to coat without pooling.
Room Temp Setting
Never rush the setting process! Let hearts sit at room temperature for 10 minutes after glazing to develop their final texture. This step prevents condensation and ensures the cocoa dust adheres perfectly.
If your kitchen is humid, place a desiccant packet nearby to absorb excess moisture while they set. Patience here makes all the difference. ⏳
Unmolding Like a Pro
Run a small offset spatula around the edges of each mold to loosen the ganache before gently tapping it on the counter. If hearts crack, it’s usually from uneven cooling—next time, place molds on a wire rack instead of directly on the fridge shelf.
For extra stability, chill the molds for 10 minutes before unmolding. No more broken hearts!
Nutrition facts
Frequently asked questions
Can I make these chocolate hearts without silicone molds?
Use heart-shaped cookie cutters on a parchment-lined baking sheet. Press the cutters firmly into the ganache to create clean edges, then chill until firm (15 minutes). For extra stability, place the sheet on a wire rack inside the fridge. The texture stays the same—just the presentation changes!
Why did my chocolate ganache turn grainy?
Overheating is the usual culprit. Chocolate should never exceed 110°F—if it gets too hot, whisk in 1 tsp cold cream to cool it down. Also, avoid condensation by letting melted chocolate rest for 2 minutes before adding butter. For smooth results, use high-quality chocolate with at least 70% cocoa.
How can I add flavor variations?
Swap the vanilla for 1/2 tsp orange zest or 1/4 tsp cinnamon in the glaze. For filled hearts, melt 2 oz extra chocolate, mix with 1 tbsp raspberry jam, cool slightly, then pipe into the centers before the ganache sets. Always let filled hearts set 5 minutes longer to prevent leaks.
Can I make these ahead for gifting?
Yes! Store completed hearts in an airtight container with parchment between layers. They stay fresh for 5-7 days at room temperature. For gifting, wrap individually in cellophane bags with a ribbon. Avoid refrigeration—it causes condensation and dulls the sheen. Add a "best by" date tag for a polished touch.
What's the secret to preventing cracks?
Uneven cooling causes cracks. Place molds on a wire rack (not directly on fridge shelves) for 2-3 hours at room temperature. If your kitchen is humid, use a desiccant packet nearby. For extra insurance, tap molds gently on the counter after 10 minutes in the fridge to release air bubbles before final chilling.