Desserts
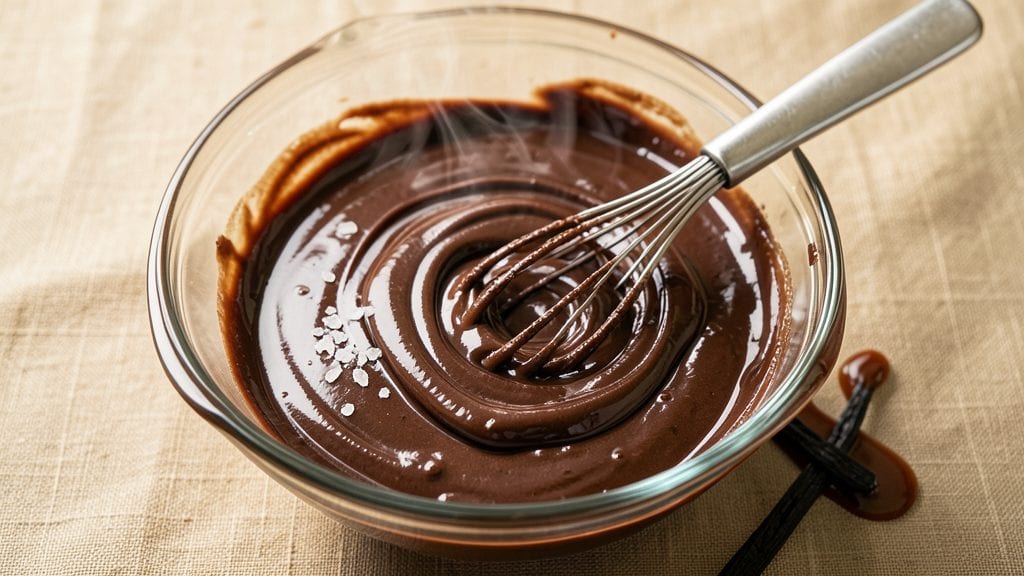
Betty Crocker's chocolate icing recipe delivers that perfect balance of rich cocoa flavor and smooth, spreadable texture—ideal for cakes, cupcakes, or cookies. The secret lies in precise measurements and powdered sugar as the thickener, ensuring a consistency that's neither too stiff nor too runny.
I've perfected this version over years of baking, and it consistently yields a glossy, velvety finish that sets it apart from store-bought alternatives.
This recipe relies on just six key ingredients, all of which can be found in any well-stocked pantry. The combination of cocoa powder, butter, and powdered sugar creates a stable base, while vanilla extract adds depth and warmth.
What makes this icing truly special is its versatility—adjust the powdered sugar ratio to achieve a thicker frosting for layering or a thinner consistency for drizzling over desserts.
The result is a chocolate icing that's rich yet smooth, with a glossy sheen that makes any dessert look professionally decorated. Whether you're filling a layer cake, piping cupcakes, or creating decorative borders, this recipe delivers consistent, professional-quality results every time.
The texture stays stable even in warm temperatures, making it perfect for events or when you need to transport decorated treats.
Optional flavor variations include adding a pinch of peppermint extract for a festive twist or a splash of coffee liqueur for deeper cocoa notes. For a lighter finish, you can substitute half the butter with cream cheese.
Let's get started on creating this timeless classic that's sure to elevate any dessert you prepare.
Ingredients for betty crocker chocolate icing
Six simple ingredients transform into velvety chocolate icing perfect for cakes and cupcakes.
| Ingredient | Amount | Notes |
|---|---|---|
| Unsalted Butter 🧈 | 1 cup | Softened to room temperature |
| Cocoa Powder 🍫 | 1 cup | Natural or Dutch-processed |
| Powdered Sugar 🍚 | 3 cups | Sifted for smooth texture |
| Vanilla Extract 🌿 | 1 tbsp | Pure vanilla preferred |
| Milk 🥛 | ¼ cup | Whole milk for richness |
| Salt 🧂 | ¼ tsp | Fine sea salt |
The butter and cocoa powder are your foundation. Use European-style butter if you can—it has a higher fat content and creates a smoother finish. For cocoa powder, Hershey's Special Dark or Dutch-processed brands work best, but natural cocoa gives a richer color. Powdered sugar is non-negotiable here—it's what gives this icing that perfect spreadable consistency. If you're using a boxed mix, skip it—homemade tastes infinitely better. The vanilla extract should be pure, not imitation. Trader Joe's has a great affordable option, but any good-quality brand works. And don't forget to sift that powdered sugar—lumps are the enemy of smooth icing.
No butter? Cream cheese or shortening can work in a pinch, though texture will differ slightly. Short on milk? Heavy cream or water will do, but milk adds that perfect balance. Want to go dairy-free? Coconut milk works surprisingly well, though it'll be slightly lighter. The salt might seem like a tiny amount, but it's crucial—it rounds out all the sweetness. If you're feeling fancy, add a pinch of espresso powder to deepen the chocolate flavor without adding coffee. For a festive twist, swap half the vanilla for peppermint extract—perfect for holidays. And if you're making this ahead, the icing actually tastes better the next day as the flavors meld together.
This icing keeps beautifully—store it in an airtight container in the fridge for up to 1 week, or freeze for 3 months. To use, let it sit at room temperature for 10-15 minutes before piping. It thickens as it cools, so if it's too stiff, add a splash of milk to loosen. For the smoothest finish, beat it with a hand mixer for 2-3 minutes before using. This makes about 3 cups, which is perfect for a two-layer 8-inch cake or about 24 cupcakes. Make extra—it disappears fast when you're decorating!
Why You'll Love This Recipe
- Here’s what sold me: the milk keeps it from seizing up like my old burnt-sugar disasters. Stir it warm, not hot, and you’ll get that glossy, pipeable perfection every time. No lumps, no stress—just creamy, dreamy chocolate that spreads like a dream.
- I’ll be real: I always make extra. The icing thickens beautifully overnight, and a splash of warm milk brings it right back to life. Perfect for stashing in the fridge for quick decorating—no last-minute store runs when you’ve got this in your back pocket.
Step-by-step instructions for betty Crocker's chocolate icing recipe
Here's how to make this classic chocolate frosting that's rich, smooth, and perfect for layering cakes.
Softened Butter and Cocoa Powder
First, make sure the 1 cup unsalted butter is softened to room temperature. I press it gently with my finger—it should dent slightly but hold its shape. This ensures it blends smoothly without clumping. In a large mixing bowl, combine the softened butter and 1 cup cocoa powder. Use a wooden spoon or rubber spatula to stir until fully incorporated. You want to break up any lumps in the cocoa powder so the icing stays smooth.
This step is all about creating a solid base. The cocoa powder needs to dissolve completely into the butter to prevent graininess in your final icing. If you're using natural cocoa powder, you might see some flecks—this is normal and will blend out as you add the other ingredients.
Add Powdered Sugar and Salt
Next, gradually add the 3 cups powdered sugar to the butter-cocoa mixture. I like to sift it first for an extra-smooth texture, but if you don't have a sifter, just sprinkle it in slowly while stirring continuously. This prevents clumping and ensures even distribution. After adding about half the powdered sugar, sprinkle in the 0.25 teaspoon salt and mix well. The salt enhances the chocolate flavor and balances the sweetness.
Use a hand mixer or stand mixer on medium speed to blend everything together. You're looking for a thick, paste-like consistency at this point. If it feels too dry, that's okay—we'll add the milk next to reach the perfect spreadable texture. This step is where the icing starts taking shape, so don't rush it. Let the mixer do the work for about 2-3 minutes to fully incorporate all the ingredients.
Incorporate Vanilla and Milk
With the mixer running on low speed, add the 1 tablespoon vanilla extract and 0.25 cup milk one at a time. Start with the vanilla first, then slowly pour in the milk while mixing continuously. The milk helps thin the icing to a smooth, spreadable consistency. If it's still too thick after adding all the milk, you can add a splash more—just 1 tablespoon at a time—until it reaches your desired texture.
Here's the thing—this icing should be thick enough to hold its shape on a cake but still easy to spread. I like to test it by spooning a small amount onto a plate. If it holds its shape but can still be spread with a spatula, you've got it right. If it's too runny, add a bit more powdered sugar; if it's too stiff, add a tiny bit more milk. The key is balance.
Mix Until Smooth and Glossy
Continue mixing on medium speed for 2-3 minutes until the icing is completely smooth and glossy. You'll notice it thickens slightly as it cools, so it's better to err on the side of slightly thinner now. The final texture should be like a thick pudding—easy to spread but still able to hold peaks when piped.
Taste a small spoonful to check the flavor. If it needs more sweetness, add a bit more powdered sugar; if it needs more richness, add a tiny bit more butter. The salt should be just noticeable, enhancing the chocolate flavor without overpowering it. Once you're happy with the taste and texture, transfer the icing to a bowl and cover it with plastic wrap, pressing the wrap directly onto the surface to prevent a skin from forming.
Chill and Use
Let the icing chill in the refrigerator for at least 30 minutes before using. This step is crucial—it allows the flavors to meld and the texture to set properly. Chilling also makes the icing easier to spread and prevents it from melting too quickly in warm temperatures. When you're ready to use it, give it a quick stir to smooth out any separation that might have occurred during chilling.
This icing is perfect for layering between cake layers or frosting the top of a sheet cake. It's rich enough to stand on its own but still light enough to not overwhelm the cake. If you're using it for piping decorations, you might want to thin it slightly with a bit more milk for easier flow. Enjoy your homemade chocolate icing—it's so much better than store-bought!
Pro Tips For Making Betty Crocker Chocolate Icing
- Melt Butter Slowly: If you toss cold butter into the pot and turn up the heat, you’ll end up with lumps that never fully dissolve—no matter how much you stir. Instead, melt the butter over medium-low first, then add it to the warm (not boiling) milk. That way, the fat incorporates smoothly, and your icing won’t seize up like glue.
- Sift the Cocoa: I learned this the hard way—dumping unsifted cocoa powder straight into the pot leaves gritty bits that ruin the texture. Even if the bag says "sifted," give it a quick pass through a fine-mesh sieve before measuring. Your icing will be silky, not sandy.
- Stir Constantly: The moment you walk away, this icing thickens into a stubborn paste. If you’re not watching, you’ll end up with a lumpy mess that no amount of whisking can fix. Keep the heat at a gentle simmer and stir every 30 seconds until it’s thick enough to coat the back of a spoon.
- Add Vanilla Last: Vanilla burns off fast, and if you add it too early, the heat will turn it bitter. Wait until the icing is off the heat but still warm, then stir in the vanilla. That way, you get all the bright, sweet flavor without any off notes. (Yes, even if you’re impatient like me.)
Storing and reheating your betty crocker chocolate icing
Refrigerator Storage
Store your freshly made chocolate icing in an airtight container with a lid—glass jars or plastic containers with tight seals work best. Press plastic wrap directly onto the surface to prevent drying or skin formation.
Keep it refrigerated at 40°F or below for up to 1 week while maintaining its rich, velvety texture. I always make extra because it disappears fast when decorating! 🧈
Freezing for Later
For longer storage, freeze your icing in quart-sized freezer bags or airtight containers, leaving ½ inch headspace for expansion. Thaw overnight in the fridge before use—never microwave, as it can make the icing grainy.
Frozen icing keeps its quality for up to 3 months, perfect for holiday baking prep. Just give it a quick stir after thawing to restore smoothness.
Reheating Thickened Icing
If your icing thickens after refrigeration (which happens often), revive it by adding 1 teaspoon milk at a time while mixing with a hand mixer. For stubborn stiffness, warm the container in 30-second bursts in the microwave (cover with a damp towel) until just softened.
Never overheat—just enough to loosen the texture. This method works perfectly for restoring the spreadable consistency. ✨
Room Temperature Use
Let chilled icing sit at room temperature for 10-15 minutes before piping or spreading—this prevents melting on warm cakes. If it's too runny after warming, chill for 10 minutes in the fridge to firm up slightly.
I test consistency by spooning a small amount onto a plate: it should hold its shape but still be spreadable. This balance is key for professional-looking results.
Reviving Dried Edges
If the edges of your icing dry out during storage, simply mix in 1 teaspoon milk or water and beat until smooth. The center will usually remain unaffected. For severely dried icing, add 1 tablespoon milk and mix vigorously.
This trick saves perfectly good icing from becoming unusable. Always store with the surface covered to prevent this issue entirely.
Temperature Tips
Work with icing at room temperature for best results—cold icing spreads poorly while warm icing melts too quickly. If your kitchen is warm, chill the icing for 10 minutes before using.
For outdoor events, keep the icing in a cooling tray with ice packs nearby. This ensures your decorations stay perfect even in summer heat. 💫
Nutrition facts
Frequently asked questions
Can I substitute butter with margarine in this recipe?
While you can technically use margarine, it won't give you the same rich, velvety texture. Butter adds fat content that creates a smoother, more stable icing. If you must substitute, use 1 cup dairy-free butter substitute or ½ cup cream cheese for a slightly tangy twist. The flavor will differ, but it'll still work for spreading.
Why did my icing turn grainy?
Graininess usually happens when cocoa powder or powdered sugar isn't fully incorporated. Always sift your powdered sugar and mix on medium speed for 2-3 minutes to ensure smoothness. If it's already made, beat in 1 tablespoon milk and mix vigorously—this often dissolves the texture issues. For prevention, use a stand mixer instead of a hand mixer.
How do I adjust the consistency for piping decorations?
For piping, thin the icing slightly by adding 1 tablespoon milk at a time until it reaches a thick syrup consistency. Test by spooning a small amount onto a plate—it should flow smoothly but still hold its shape when piped. For rosettes or borders, aim for a consistency between honey and heavy cream. If it's too thick, add milk; if too thin, chill for 10 minutes and rebeat.
Can I make this icing without milk?
Yes! Replace the ¼ cup milk with ¼ cup water for a lighter texture or ¼ cup heavy cream for extra richness. For a dairy-free version, use ¼ cup coconut milk or almond milk, though the texture will be slightly lighter. The key is to add liquids gradually while mixing to avoid making it too runny.
How do I prevent my cake from sinking when using this icing?
To avoid a soggy bottom, chill your cake layers for 2 hours before assembling, then spread a thin layer of chocolate ganache or jam between layers instead of icing. For extra stability, use a cake board when frosting and let the icing set at room temperature for 1 hour before serving. This gives the layers time to firm up properly.